Jul 30, 2012

Favorite Pot Roast (Dilled Pot Roast)


This is probably one of the earliest recipes I have ever tried and have truly fallen in love with. I have been cooking this for about 7 years now. What attracted me to this recipe was its simplicity. Slow cooked, only a few ingredients, how can I say no? And then we tasted the result, melt-in-your-mouth tender beef paired with a delicious dill-sour cream gravy...wow! So good! I so love this that I have never bothered to look for any other pot roast recipe ever since. I honestly have not prepared roast beef any other way. When you find the best, you stick to it.

When we travel abroad and I get the chance to cook, this is always on our menu. In South Africa, I even bought a slow cooker just so we can have this. We search for the chuck roast in the nearest market (unfortunately, not all countries have this particular cut) find a butcher who can cut us one, cook it, then serve it to our guests. It's always been a winner.


Just try it and you'll see what I mean!


Ingredients

3 - 4 lbs. Beef chuck roast
1-2 teaspoons dried Dill Weed, or to taste
Salt and pepper, to taste
1/4 cup Water
2-3 Tablespoons  rice vinegar (I use 3 tablespoons if am cooking the 4 pounder)
3 Tbsp. Flour (or cornstarch diluted with water for gluten-free option)
1 cup Sour Cream

Procedure

Generously season the beef chuck roast with dill weed, salt and pepper. Truth is, I don't measure the amount of dill weed. I just eyeball it. Place the seasoned beef in the slow cooker. Add the water and vinegar. Cook on low for about 7-8 hours or until roast is tender. I usually crank up the slow cooker to high for the first hour and then turn it to low for the rest of the time. This is to speed up the simmering process a bit.

Remove the cooked roast from the slow cooker and transfer it into an oven-proof dish. Cover with foil. While I am doing the sour cream gravy I usually place the roast in the oven (250F) to keep it warm.

Add the sour cream and flour into the liquid that's left on the slow cooker. Mix by using a whisk until everything is combined and there are no more flour bits floating. Turn the cooker on high and cook for a further 10 minutes or until the gravy is thick enough and heated through. You may also add more dill if you like and adjust the seasoning to your taste. I just like it the way it is, tangy and delicious!

Take the roast out of the oven and serve with the sour cream gravy on the side. Have it with steamed rice and green veggies. Perfectly paired with green beans, broccolli or peas. Yum!

If you wish to print the recipe, there's a print-friendly icon at the end of the post. Click on the "remove images" box for easy and convenient printing.

If you like what you see and would like to receive new recipe updates we'd love you to subscribe to our posts and join our site. Also do like us in Facebook or follow us on Pinterest so you can get the latest updates and so much more. Thanks for visiting and happy browsing!


Share:

Jul 27, 2012

Blueberry-Zucchini Bread

With both blueberries and zucchinis added, this summer bread comes out so moist and so deliciously good!  Perfect treat for the whole family!

With both blueberries and zucchinis added, this summer bread comes out so moist and so deliciously good!  Perfect treat for the whole family!

One of the summer rituals in Michigan is blueberry picking. I love blueberry picking! I love that I can bring the tots to a blueberry farm so they can enjoy getting the blueberries straight from the trees. They love it too! They especially love to eat them straight from the trees as well so I end up doing most of the picking. I ask them, "So where are the berries that you picked?" And with that silly smile on their faces they say, "But we ate them already." Oh well, at least they had some free snacks! Here's Sophie with her friend, Gabby, posing by a blueberry tree.


Aren't these girls gorgeous?

We picked over 3 kilos of blueberries ( 6 lbs +) and now I have to think about what I'm going to do with them. Half of them would be eaten by my family, but the other half would be used for cooking. Am planning to go back to the blueberry farm before the season is over so I can get some more for freezing. That way, I can still enjoy my berries in the middle of winter! Yay!

Here's one of my favorite summer recipes, Blueberry-Zucchini Bread.


With both blueberries and zucchinis added, this summer bread comes out so moist and so deliciously good!  Perfect treat for the whole family!


Print Friendly and PDF


Click on the  above icon to print. To delete photos, click on the image box and tick the "remove" button.

Ingredients

1 ½ cups plain Flour 
1 cup plus 2 Tablespoons Sugar
½ teaspoon Salt
1 teaspoon Baking Powder
½ teaspoon Baking Soda
1 teaspoon  ground Cinnamon
½ teaspoon ground Nutmeg
2 Eggs
1 teaspoon Vanilla extract
½ cup vegetable Oil
1 cup Zucchini, grated/shredded
1 cup Blueberries (roll in flour before you fold them in to prevent the berries from sinking into the bottom of the pan)


Procedure

Preheat oven to 350 F/ 180 C. Lightly grease a loaf pan or line with parchment paper.


In a large bowl, combine the dry ingredients - flour, salt, sugar, leavening agents, cinnamon and nutmeg. 

In a mixing bowl beat together the eggs, vanilla, oil and zucchini.


Pour the wet ingredients into the dry and mix just until combined.


Fold in the blueberries. Transfer to the prepared loaf pan.


Bake for about 55-60 minutes, or until a tester/toothpick inserted in the center comes out clean. 

With both blueberries and zucchinis added, this summer bread comes out so moist and so deliciously good!  Perfect treat for the whole family!


Cool for about 30 minutes in the pan and then turn onto a wire rack to cool completely. Enjoy!

If you like what you see and would like to receive new recipe updates, we'd love you to subscribe to our posts or join our site. Needless to say, we'd love you to like us on Facebook too where you can get more recipes and updates. Thanks and happy browsing!
Share:

Jul 23, 2012

Mushroom and Feta Cheese Scramble


We love eggs for breakfast. But sometimes, the same old, same old style can get really boring. So, rummaging in the fridge one breakfast morning, I looked around to see what I can use with eggs. I saw some mushrooms and I always pair them with eggs. But I have half a tub of feta cheese that still needed to be used. So there goes, instead of the usual cheddar cheese on my omelette and scramble I thought why not feta instead. So here's an easy breakfast scramble that just works so well together! Let's have a great start to our morning!

 Ingredients


A little olive oil (about 2 Tbsp) or non-stick spray
5 large eggs (some eggs have really small yolks so add more if needed)
8 oz mushrooms sliced
2-3 tablespoons low fat crumbled feta (I had the flavored one but it doesn't matter really)
Salt and pepper, to taste

 Procedure

Heat a little oil or use a nonstick oil spray in a medium to large skillet. When the oil is hot enough, saute the mushrooms until tender about 5 minutes.


While you are sauteeing the mushrooms, crack the eggs and then whisk them to combine. Season with salt and pepper.  When the mushrooms are done, move them to one side of the pan and then pour in the eggs. Let them set for a bit.


Scramble until the eggs are almost done. Add half of the crumbled feta cheese and continue to cook until the eggs are fully done.


Serve with the remaining feta cheese on top. Don't forget the rice!

If you wish to print the recipe, there's a print-friendly icon at the end of the post. Click on the "remove images box" for easy printing.


If you like what you see and would like to receive new recipe updates, we'd love you to subscribe to our posts or join our site. Needless to say, we'd love you to like us on Facebook too where you can get more recipes and updates. Thanks and happy browsing!
Share:

Jul 21, 2012

Lovely Blogs

I  had mixed emotions when I first saw the message of Jen of jenbeansblog in one of my posts telling me that I had been nominated for the lovely blog award. I was both elated, humbled, in fact, a little embarassed, for being bestowed this honor.


Thank you very much Jen! You are so kind to give me such recognition. It will surely inspire me to make my blog even better.

Jen herself has quite a lovely blog. I especially love her bread section. Her posts are not only creative but also inspiring for those who wish to attempt any form of bread-making. I do hope you can check out her blog, too.


I learned that there are certain rules for this award. Once you have been kindly nominated for the award you ought to:

1. Link back to whoever nominated you. (Done that!)
2. Write 11 random facts about yourself. (This is going to be tricky....)
3. Nominate 11 bloggers. (That's easy enough though 11 may not be enough...)


Now for the 11 random things about me:

1. I grew up in an island called Marinduque, one of the 7,107 islands of the Philippines. Sadly, I am not a good swimmer despite having been surrounded by water most of my life and nearly drowned once.   

2. I am a lawyer by profession but currently a happy stay-at-home mom.

3. I used to work for the Philippine Senate and the Supreme Court.

4. Before I took up law, I was once a TV producer in one of the local networks in Manila.

5. I met my British husband in London while I was studying at Oxford.

6. By God's grace, I have been able to travel and visit over 130 cities in 26 countries.

7. I love to sing as much as I love to cook. Our neighbors in Manila were both my willing and unwilling audience for the longest time!

8. I've never tasted balut (Boiled duck embryo - a Filipino delicacy) and I don't think I ever will.

9. My scariest experience was when I was robbed at knifepoint in Manila..

10. I  have been involved in at least 3 major car accidents (2x in the US and once in South Africa). Never my fault in any of those. Yes, if things went really bad, I could have died. I am thankful to be alive.

11. But, I am not scared of whatever life may bring for I am a follower of Christ. I know He is in control.

Finally, here's my list of very noteworthy, very lovely blogs, indeed. I learn much from them and think they are all an excellent read. Therefore, I nominate them all for the lovely blog award.

1. http://www.awkwardkitchenette.com/  
2. http://www.agirlandherfood.com/ - 
3. http://www.sandraseasycooking.com/ 
4. http://katefromscratch.com/ 
5. http://esskunst.org/ 
6. http://messmakesfood.blogspot.co.uk/ 
7. http://www.shemakesandbakes.com/
8. http://sistersizzle.com/
9. http://bakerbettie.com/
10. http://www.nillawan.com/
11. http://menubyvicky.com/

Thanks again Jen for the recognition! Looking forward to sharing recipes with all of you!


Share:

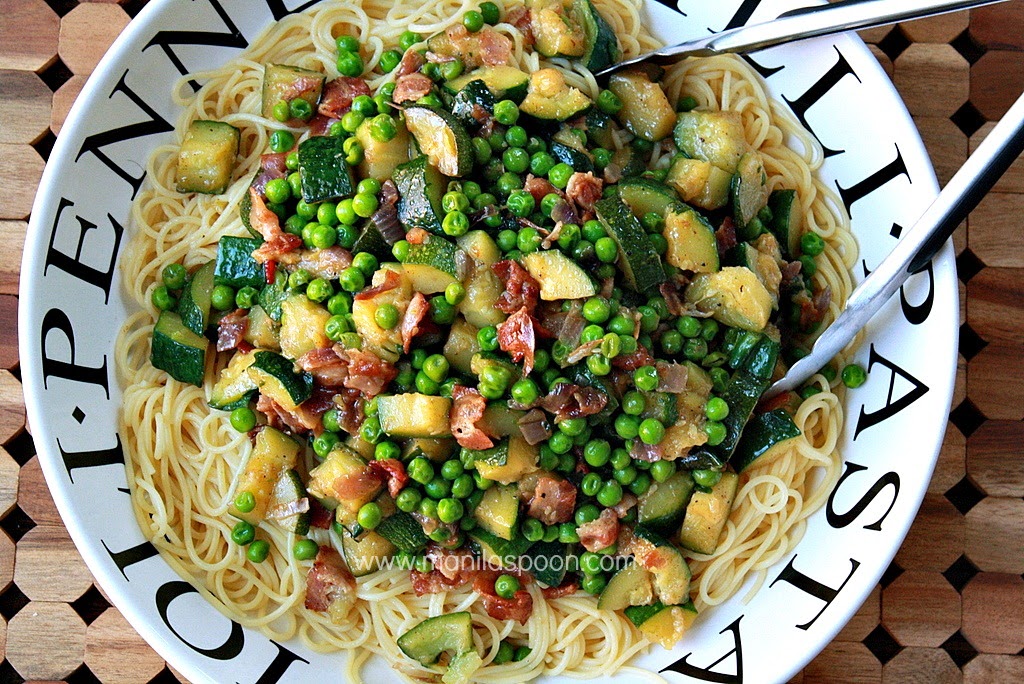
Spaghetti with Zucchini


A delicious and easy way to use up Zucchini. We've thrown in some Bacon for good measure! Spaghetti with Zucchini | manilaspoon.com

I love the Farmer's Market! I can get all my local produce during their peak season. For me fresh is best, indeed. One of the lovely summer veggies is zucchini or courgette, also known as summer squash. Zucchini is very versatile for it is not only great with savory dishes, it's perfect for baking too. Add it to a sweet bread recipe and you're sure to have a yummy moist bread. My favorite is the combo of zucchini and blueberries but I will do that for another post.
Share:

Jul 20, 2012

Spaghetti with Roasted Peppers and Bacon


Pasta, Spaghetti, roasted, peppers, bacon, dinner, entree


It's summer time! That means bell peppers are aplenty. That also means they are cheaper than usual. When this time comes, I load my fridge with bell peppers 'cause they are one of my favorite veggies. Not only are they pretty to look at - love the variety of colors -they are packed with Vitamins A, C, B6 and folate. Very nutritious, indeed. In fact, I read somewhere that those who are trying to lose weight need to include bell peppers in their diet because the vitamins in them provide tremendous health benefits for both fat burning and overall good health. Ok, I am sold!


I especially love to use roasted peppers in pasta. The taste is so subtle and yet quite wonderful.

Here is the recipe, originally from Giada De Laurentiis' book Everyday Pasta, which I have adapted. Her version is meat-free because it was used as a side dish. I wanted to make it more of an entree or a stand-alone meal, hence, I added some bacon to give it a more robust flavor.

Enjoy!


Ingredients


6 large bell peppers, choose your fave color
1-2 Tbsp olive oil
6 strips of bacon (chopped or you may crumble it later after you've cooked it)
1 large onion
salt and pepper, to taste
1 cup white wine
1 14 oz can chicken broth
1 lb spaghetti
1/2 cup fresh flat leaf parsley, chopped (optional)
Grated parmesan cheese, to taste


pasta, dinner, spaghetti, peppers, roasted, bacon, entree, summer


Procedure

Roast the peppers under the broiler or, better yet grill them above the flame, until their skins turn brownish-black and start to pull away. Turn the peppers occasionally and roast/grill for roughly 20-25 mins (broiler method).


Set aside the peppers until they are cool enough to handle. Others place them inside a plastic or paper bag as it helps make the peeling of the skin easier. Remove the skins and seeds and cut them into strips.
Heat a little oil in a large deep pan. Add the bacon. Cook the bacon until brown and crisp. Transfer to another plate and set aside. You will use bacon as topping later. I remove half of the accumulated fat on the pan too but you can use all of it if you wish.

Stir in the chopped onion and saute for about 3 mins. Deglaze the pan with a little wine to remove the brown bits on it.


Add in the pepper strips. Season with salt and pepper and continue to saute for another 2-3 minutes. Pour in the wine and chicken broth and simmer on low heat for about 15-20 mins.


While you are simmering the peppers, begin to cook the pasta.

When all's done, check the seasoning on the pepper sauce and mix in the pasta, parsley and some parmesan cheese. It will be a little watery but once you put some cheese, it will thicken. The cheese can sometimes stick to the spatula so I only put a small amount and just add more on my plate.


Don't forget to sprinkle the crumbled bacon on top! Have a fun Italian dinner!


Share:

Jul 18, 2012

Chicken Paella


This is a simple yet flavorful paella. I was inspired to make this at home in the summer of 2010 after our trip to Barcelona where I tasted what was to me a truly excellent paella. It was seafood paella with jumbo shrimps and mussels. What a gustatory delight!

Below is a photo of the paella we had.


Alas, I do not live near the sea, so making paella using the freshest sea food is not always possible. Also, making a paella dish can be rather intimidating.

Nonetheless, I decided to make this favorite rice dish of mine with ingredients that are at hand. I did not include saffron threads because sometimes they are not readily available and they're quite expensive too! Instead, I used paprika and turmeric to give both flavor and color to the rice. The result is wonderful! Now, I can just reminisce about Barcelona whenever I eat it.


If you like what you see do subscribe to our posts via email. You can also like us in Facebook or  join us on Pinterest so you can get the latest recipes and so much more. Thanks for visiting and happy browsing! 


Ingredients:

4 organic chicken thighs (skin on)
Salt and pepper
Flour for dusting (use alternative flour if you want it completely gluten-free)
3 tbsp olive oil
1 onion, finely chopped
4 garlic cloves, finely chopped
1 tsp Spanish paprika
1 tsp turmeric
1 ½ cups jasmine rice (uncooked)
3 cups chicken stock
2 plum tomatoes, petite diced
1 cup frozen peas
1-2 Red, yellow or orange sweet peppers, seeded and diced
4 oz Spanish Chorizo sausage, chopped 


Procedure:

Preheat the oven to 350ºF. Season the chicken pieces with salt and pepper and then dust with flour.


Heat the olive oil in a large deep oven-proof pan or a Dutch oven and then fry the chicken until golden brown on both sides. Transfer the chicken pieces to a baking tray and into the oven for about 20 minutes.

While the chicken is cooking in the oven, prepare the accompanying vegetables.
Using the same pan where the chicken was cooked, sauté the onion and garlic and cook until the onions are soft, about 3-4 minutes.  Add the paprika and turmeric. Stir-fry just until aromatic, less than a minute. Add the uncooked rice and chicken stock and mix. Bring to a boil. When it begins to boil, turn off the heat. We will continue cooking it in the oven.

Get the chicken from the oven and place in the pan with the rice and cook in the oven for about 15 mins. The rice should be almost dry at this point. Take the pan out of the oven, remove the chicken pieces to a plate, and then stir in the remaining ingredients except the chorizo. Put the chicken back on top  of the rice. Place the lid on the pan and then bring it back to the oven and bake for a further 10-15 minutes or until the chicken is tender and the rice has fully absorbed the stock. During the last few minutes, heat a little oil and fry the chorizos until brown and crispy. Keep warm. 

Remove the pan from the oven and transfer its contents to a deep serving dish, placing the chicken on top. Spread the chorizos around. Serve with a wedge of lemon, if desired.

Note: You may add the chorizo with the other ingredients (bell peppers, tomato, etc.) and let it cook in the oven. However, it may become chewy though it does add more flavor to the rice.

If you wish to print the recipe, there's a print-friendly icon below the post. Click on the "remove images" box for easy and convenient printing.

If you like what you read and wish to follow the posts, do join our site or like us on Facebook. Thanks for dropping by! 

Share:

Jul 17, 2012

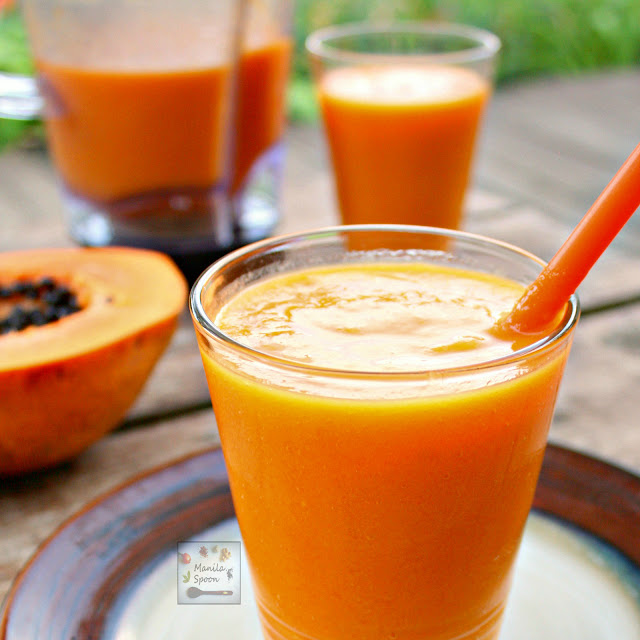
Mango Papaya Smoothie


I literally grew up surrounded by papaya trees. My mom loved cultivating them so we always had a few of them in our backyard. In our house in Manila there's at least one papaya tree in our front yard. Papaya trees are great to grow for they often yield a bountiful harvest of fruits. They are also quite versatile for not only can you eat the ripe papayas, even the green (unripe) ones are quite handy to use in savory dishes. They are especially good when combined with poultry.

The other day I went to a nearby Mexican grocery to get some tomatoes. In their fruit and veggie section, I saw a ripe papaya and immediately grabbed it (after paying, of course!) and brought it home. I don't often find a ripe papaya so when I see one I take the chance to buy it. I am always thrilled when I find tropical fruits in the grocery. It always brings me back closer to home. 

Here I am using the papaya fruit in a smoothie/shake 'cause it is perfectly ripe and sweet!


I had some left-over mangoes as well so I thought what better way to make a smoothie than to combine my two favorite tropical fruits. 

To make it creamier I do add a bit of milk, but if you wish to make a pure smoothie, just leave out the milk and blend as usual.


Ingredients


3 cups papaya, seeded and chopped
3 cups mango flesh, chopped
2 cups crushed ice
1/2 cup milk, or more if desired
brown sugar (or your favorite sweetener), to taste


Procedure 

Mix all ingredients in a blender. I usually start with some ice on the bottom of the blender because they are harder to crush and then I pile on the rest of the ingredients on top. 

*My mango bits  were frozen so I had to let them thaw a bit and then I placed them at the bottom of the blender with a little water or milk so they would puree better.

But if all your ingredients are fresh, proceed as above. I use the smoothie/shake button on my blender.

Serve immediately. Truly a healthy and refreshing drink!


Proof that it's yummy --- happy customers like these two!


We love to hear from you. Do share your comment or feedback on any of our recipes. 

If you like what you see and would like to receive new recipe updates, we'd love you to subscribe to our posts or join our site. Like us on Facebook or follow us on Pinterest where you can get more recipes and updates. Thanks and happy browsing!


Share:

Jul 14, 2012

Ice Cream Sandwich


Need I say more? To be honest, this photo leaves me speechless..... and very hungry! J

Of late, when I write a post it seems that I always relate it to something that I have experienced in the past, particularly my childhood. My memories, just like most Filipinos, revolve around food. Experiences are built at or around food. When families and friends get together, there's always food. In fact, our customary greeting, "Kumusta ka na? (How are you?) is often followed by, "O, kumain ka na ba?" (Have you eaten)? To say that we love food is an understatement.

Again, I have been reminiscing about our childhood snacks in the Philippines. At around   mid-afternoon, we like to have "meryenda" (snacks). Of course, every child's favorite snack is "sorbetes" or ice cream.

In neighborhoods, you would hear the sound of a bell ringing and, no, it's not from a church bell, it's actually from the local ice cream man/vendor or "Mamang Sorbetero" as we fondly call them. Every town or village would have their own local ice cream vendor that we even have a song written about it. Click here to see what a typical "Mamang Sorbetero" looks like. 

Sometimes we buy "sorbetes" in a cone but there are times when we buy ice cream in a roll or bun. Yes, an ice cream sandwich. My husband cannot believe we eat ice cream with bread. I told him he should try it 'cause it's really good. So far I have not been successful in convincing him. Perhaps if the ice cream is sandwiched between two cookies, he'll give in. Too bad though, the kids beat him to it!

So, when the local pandesal is not enough for your ice cream. Why not grab  two of your favorite cookies (I like the chocolate ones!) and then insert your favorite ice cream in between. For this rather indulgent version (a once-a-month perhaps even a once-a-year treat!) I used chocolate cookies and vanilla flavored ice cream. Yum!


Share:

Jul 11, 2012

Avocado Shake or Smoothie


One of my fondest memories of childhood was during the summer season in our little island called Marinduque when my mom, in the stifling heat, gave us cold refreshments to help us cool down. Often, it would be a fresh fruit shake in the form of mango, papaya, banana, guyabano, or avocado depending on whichever tropical fruit was in season.


But you may wonder --- avocado? Certainly, it's not fruit! Well, in the Philippines it is! When we think of avocado, we think of eating eat just like any ordinary fruit. We don't really use it as part of a savory dish; we just enjoy it on its own. When you get the ripest avocado, it is almost sweet though you don't expect it to be mango sweet, of course. In fact, for most of us, the way to eat avocado without much ado is to just to open it up - remove the pit,  sprinkle a little brown sugar on it and then scoop out the flesh with the spoon. Yum! When we are feeling more adventurous, we also squeeze a little juice from the local lime (calamansi) to give it some zing! Even better.


For me, apart from making guacamole, the best way to make use of avocado is to turn it into a yummy smoothie or shake. Avocado is just perfect for a shake for it naturally has a creamy texture. We don't call it a smoothie in the Philippines - with or without ice cream or milk - it is always considered a shake. I suggest the use of regular milk when making the shake instead of yogurt or ice cream 'cause it can get very thick. That shouldn't stop you from eating it with ice cream or making an avocado ice cream for that matter - perhaps I should make one soon!

So before the summer is over and when you get the craving to grab some avocados in the supermarket why not try to turn it into a yummy shake for a change. Trust me, once you've had it, you'll never see avocado the same way again.

Ingredients

2 Avocados (ripe)
2 cups crushed ice*
1 cup milk, plus more if needed (for Paleo sub with Almond or Coconut Milk)
Honey, Agave or Sugar (3-4 Tbsp if using brown sugar), to taste 

*You may or may not wish to include ice. Since Avocado smoothie/shake can be quite thick, in the Philippines we use some ice to dilute it a little plus it's a summer drink so it has to be cold.

Procedure

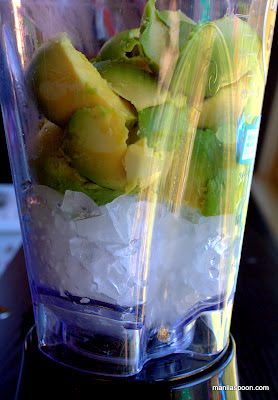
Place the crushed ice in a blender. Top it with the avocado.


Add the rest of the ingredients. Process until smooth and thick to your desired consistency. You may need to add more milk if you want just an easy pour kind of shake. I like mine a little thick and creamy.


If you are feeling rather indulgent, add some whipped cream and garnish it with a cherry on top!


We love to hear from you. Do share your comment or feedback on any of our recipes. 


If you like what you see and would like to receive new recipe updates, we'd love you to subscribe to our posts or join our site. Like us on Facebook or follow us on Pinterest where you can get more recipes and updates. Thanks and happy browsing!


Share:
© Manila Spoon | All rights reserved.
Blogger Template created by pipdig