Aug 28, 2012
Guest Post: Ginger Sesame Seed Noodles
There are certain recipes where the adage "less is more" truly applies. This is one of those. Sometimes the best flavors come out when you don't complicate the recipe. I think this is why I love this noodle dish from my blogger friend Jen of Jenbeansblog. A quick look at the ingredients will show that the aromatic flavors of ginger, sesame seed oil and cilantro are enough to make this wonderful dish a hit on your palate. This is not to mention the health benefits you get from ginger, especially for women. Jen has expounded on this on her blog. Thanks again Jen for this lovely post! I truly love the healthy dishes you feature on your blog. Now, I'll have to go to the grocery and get me some ginger and eat this! Enjoy!
Ingredients
Canola oil
10 - 15 thin slices ginger
1/3 cup rice wine (found in most Asian supermarkets - try to find the cooking kind, it has a lower alcohol content and more of the rice-y flavour)
2 eggs
2 tsp soy sauce
Optional: can add some tofu or lean beef strips for greater levels of iron
200g thin wheat noodles, cooked and drained
4 - 5 tbsp sesame seed oil
Chopped cilantro for garnish
Procedure
In a hot cast iron skillet, fry ginger slices in oil until lightly browned and sticking to the pan and the aroma is wafting. Add in rice wine and gently scratch the ginger bits from the pan. Lower the heat to medium low.
Break two eggs into ginger/wine mixture and stir until cooked. Add in soy sauce. It will be kind of soupy looking.
Take the ginger/eggs off heat and stir in cooked noodles. Drizzle with sesame seed oil and divvy up into bowls. Drizzle a bit more sesame seed oil over top and sprinkle with chopped cilantro.
Good replenishing to you all!
Aug 25, 2012
Indian Butter Chicken
To say that we like chicken curry is an understatement. We love curry to the max! Whenever we travel, whatever country that may be - the first restaurant we always try to look for is an Indian curry house.
Before I got married, I wasn't a major fan of anything spicy. In the region (Southern Tagalog) where I grew up, spicy dishes are not really a big thing. We usually love sweet, sour and salty but spicy, not too much. But then I met my British husband who is into everything spicy. I was converted by him. He loves chicken curry. When we were still in England we used to visit Brick Lane in East London for some curry therapy. If you are ever in London, this is the place to go if you want to get curry. There are rows upon rows of curry houses there. I miss this place!
However there is one special curry place for us and, no, it's not in India or the UK or even the USA (truth is, there is no Indian restaurant where I live). Sad, isn't it. We found it, of all places, in Vietnam! While it may take years before we go back and eat there again, we have fond memories of Vietnam and most certainly the curry we had there. Here's a photo of myself in front of the restaurant in Ho Chi Minh City. It's not much to look at but the curry is great, if you are able to wake up its owner to cook for you! Seriously, it was great and the best we have tasted! Check this out when you find yourself in the streets of Saigon.
And for good measure, here's another photo of me and my hubby in Vietnam. Photo was taken while we were cruising the Mekong Delta. Happy Memories!
Before I get any more sidetracked, here's one of our favorite curry dish - Indian Butter Chicken. This is a mild curry so feel free to up the heat to your desired spice level. Enjoy!
Ingredients
5 pieces Roma or plum tomatoes - or 2 (14oz/410gr) cans of diced tomatoes (fresh is better though!)
2 Tablespoons oil and 5 Tablespoons Butter
2.2 pounds (1 kilo) skinless but bone-in chicken thighs (boneless are fine but they tend to fall apart)
Thumb-size peeled and chopped fresh ginger or 1 tsp of ground ginger
3 teaspoon ground Cinnamon
2 teaspoon each red Curry powder, ground Cumin and ground Paprika
2 Tablespoons brown sugar
1 ½ - 2 tsp salt, or to taste
¼ - ½ cup of plain Yogurt (you can use heavy cream, if you prefer)
Freshly squeezed lemon juice (a must for me!)
Procedure
If using fresh tomatoes, cut-up the tomatoes and then place in a food processor or blender and puree until smooth (puree the canned tomatoes too, if using this instead). In a deep pan, heat the oil and butter on medium to low heat until the butter melts. Stir in the spices, and let sizzle briefly, for a minute or less. Add the salt and brown sugar and stir until combined. Immediately, add the chicken pieces and coat them with the spices.
Mix in the pureed tomatoes. Though the mixture may seem thick at this point, it will thin out as it simmers. Bring to a quick boil and then cover the pan and gently simmer for about an hour or until the chicken is tender, occasionally stirring it. It is done when the chicken is tender and the sauce is medium-thick. It is already good and yummy at this point but if you like a creamier sauce, add plain yogurt or heavy cream and then squeeze some fresh lemon juice, to taste. Cook a little further without boiling just until the cream is heated. Garnish with coriander/cilantro leaves. Serve hot with freshly steamed rice (basmati or jasmine are the best for this!) and some green veggies on the side. Curry heaven!
Aug 24, 2012
Demarle Food Demo
Last Tuesday we had a food demo at the house of Terese Burns showcasing the wonderful Demarle bakeware. Terese is a
distributor of Demarle products (Silpat, Flexipan and Silform
non-stick bakeware made of fiberglass and food grade silicone from
France). Here are some of the photos taking during the demo including the lovely food we made using Demarle bakeware. Since the demo ran between 11-1 pm, the food that we cooked were good for lunch/brunch. Enjoy looking!
Terese cutting up some vegetables for the tart she is going to make for us. She also gave us some valuable kitcken tips like how to properly crack an egg so as not to destroy its membranes. I didn't know that. It was quite an informative class. Everyone seems to be really listening well.
Love the color of the vegetables. Puff pastry, vegetables, gruyere cheese, salt and pepper and peach balsamic vinegar - what more can you ask for? We used the roul pat to roll out the puff pastry. Then we place the puff pastry on the deep flexipat.
After a few minutes the lovely tart is done and it was delicious! It was so easy to remove the tart from the flexipat. You can practically slide the tart to transfer it to a serving platter.
I made some spinach quiche cups and brought them to show to the other ladies how easy it is to bake in a flexi-muffin pan. The quiche just came out so beautifully.
We also baked another egg dish - Bird's Nest - Baked Bacon and Eggs. See how easily it comes off from the flexipan. We pre-cooked the Bacon in the Deep Flexi-pat. I can't believe that you can also use it in the microwave. Simply amazing!
Finally, the last but certainly not the least, we baked some dessert!
Isn't this pretty? It's a Blueberry Sour Cream Cake baked in a Sunflower Mold.
I think this is the star not so much because of the cake but because of the sunflower mold. The cake won't be as attractive if not for the mold that it was baked in. As you can see it came out perfectly, too. It was also a breeze to remove it from the pan. No need to wait for 45 minutes to ensure that nothing remains on the bottom of the pan. You can remove the cake as soon as it's cool enough to handle. No more fear in making lovely cakes. I love to bake cakes so this is on top of my wish list for sure.
Have we whetted your appetites yet? If you are interested to know more about Demarle Bakeware feel free to contact me through my contact information or click here to purchase some of the products that I use for my cooking and baking.
Finally, in case you're wondering, all the recipes of the above baked goodies are in this blog. Please refer to the side bar (archives) or the labels. And, if you like what you see and would like to receive recipe updates, feel free to join our site or like us on FaceBook.
Thanks for dropping by!
Aug 23, 2012
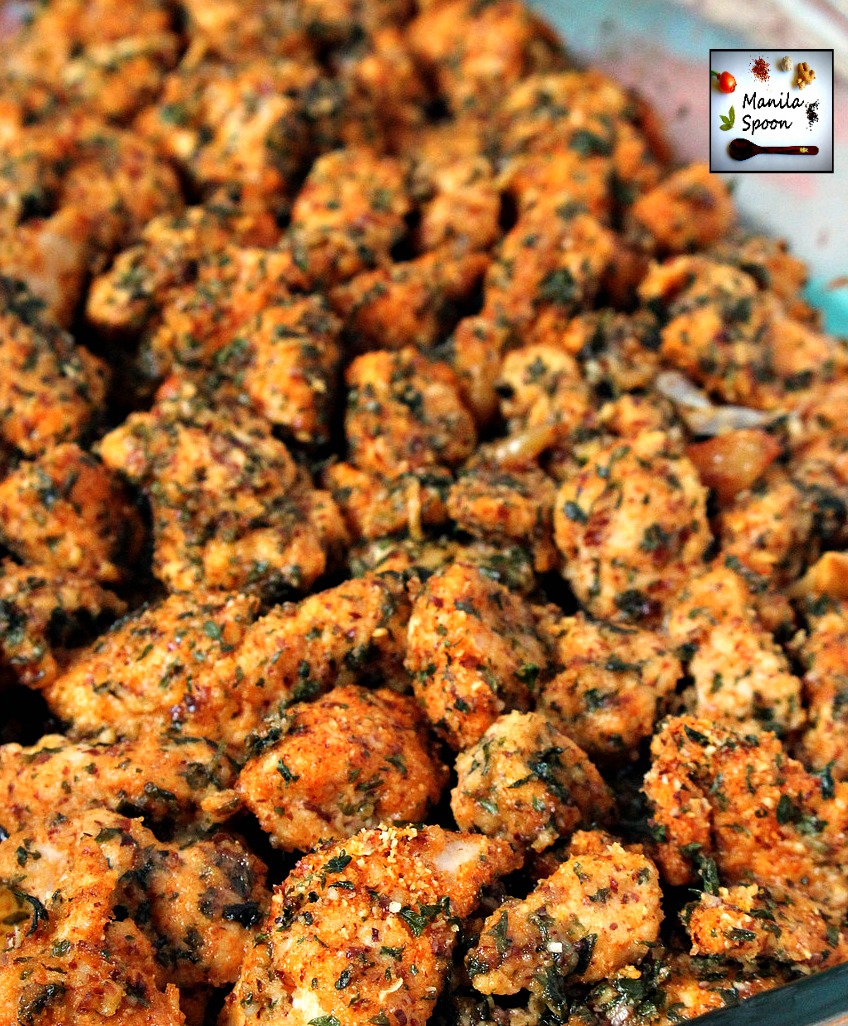
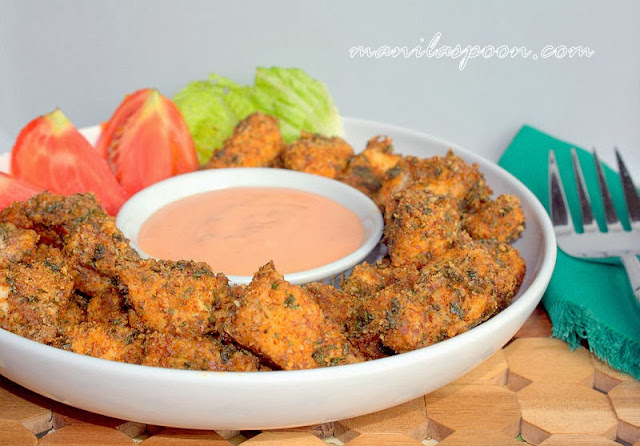
Baked Chicken Nuggets (Chicken Scampi)
A few years ago our church published a cook book entitled "Among Friends". They contain recipes shared by the lovely and talented ladies from our church. I have used this cook book often (the wear-and-tear shows!) and have discovered so many delicious recipes. Some of them I return to time and again 'cause my family simply love them. One of the recipes which we've cooked many many times (years, in fact) is the Chicken Scampi by Rebecca Braam. This is such a wonderful chicken dish, beloved by kids and adult alike. It's quite easy to do as well, which I always like in a recipe!
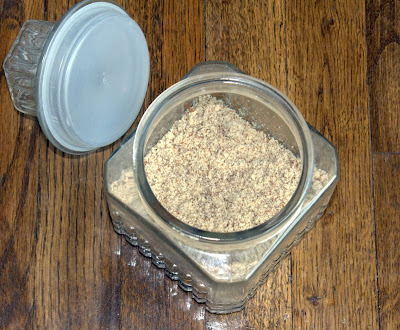
I would normally prepare this with bread crumbs as stated in the original recipe but for this version I made it low-carb and gluten-free because Mark is trying a gluten-free diet and I am doing a low-carb diet. Works well for us! Instead of bread crumbs, I used ground almonds as substitute. Honestly, I was surprised that it turned out so good! Am glad that whenever we need to go wheat-free, there is this lovely alternative. We don't need to miss out on our favorite chicken dish! Of course, for those who don't need to be wheat-free, feel free to use the bread crumbs. They are both great, either way!
The original recipe called for about 2-3 lbs of chicken breasts but my small family can only manage one so the recipe has been measured to serve a small family of 4 (mine!). Feel free to adjust the amount if you wish to serve it to more people. Enjoy!
Ingredients
1 lb chicken breasts (about 2), cut into cubes (bite-size nuggets)
1/2 cup Italian bread crumbs or 1/2 cup ground almonds (for gluten-free version)*
3 Tbsp grated parmesan cheese
2 Tbsp dried parsley flakes
1/2 tsp powdered garlic
1/2 tsp paprika
1/2 tsp salt, or to taste
Place the dry ingredients in a large bowl. Mix.
Add the chicken and coat with the mix. Alternatively, you may place the chicken with the dry ingredients in a large clear plastic bag. Shake until the chicken parts are fully coated.
For the Garlic Sauce:
3 Tbsp butter
1 Tbsp oil
3 cloves garlic, pressed
Procedure
Preheat oven to 400 F (200 C). In a large baking dish melt the sauce ingredients in the oven as it heats up.
Add chicken and coat with the garlic sauce.
Bake for about 20 minutes or until chicken is tender and fully cooked. Enjoy with, what else? Rice, of course! Serve it with a home-made and very simple thousand island dressing (just ketchup and mayo). Have a lovely meal!
Adapted from Chicken Scampi by Rebecca Braam (Among Friends Cook Book)
Aug 20, 2012
Guest Post: Miso Tofu Congee with a Side of Walnuts and Chives
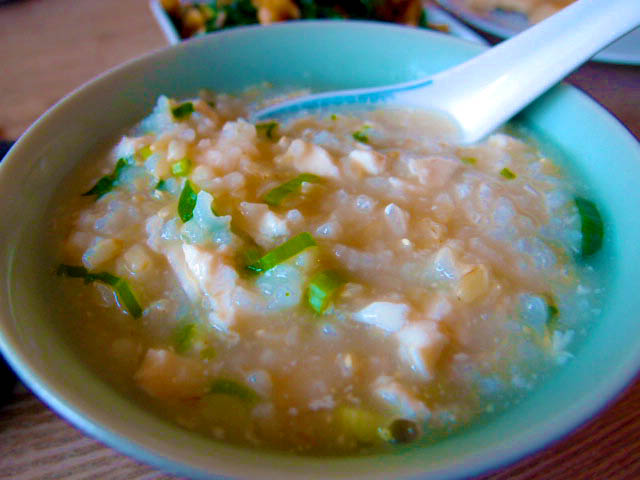
Over a month ago, I joined a publishing site called "Food Buzz." There I met many lovely bloggers and have seen the most beautiful and inspiring food blogs. One of the lovely ladies that I have met there is Jen of Jenbeansblog. We have struck a friendship and have followed each other's blog. Jen is one truly creative girl. She has a lovely blog which features delicious and mouth-watering food. I especially love her bread creations and the Asian dishes she makes. It's so nice to know that there are certain dishes that are common to both the Philippines and Taiwan such as the one we are featuring today.
Filipinos love congee. Locally, it is known as "lugaw" or arroz caldo. While in the Philippines we eat the "lugaw" on its own or with some chicken, in Taiwan they eat it with a side dish of spicy fried anchovies and peanuts. Mmmm. So yum! Why haven't we thought of that? Here she introduces another side dish - one with spicy walnuts and chives! What a great combo. When fall and winter finally arrive this dish will surely be steaming on my stove top. Thanks again Jen for sharing this yummy recipe! Can't wait to try it! So here it is, enjoy! Don't forget to check out Jen's blog when you get the chance. Happy cooking!
Ingredients
2 cups steamed Japanese short grain rice (1/2 brown rice, 1/2 white rice)
4 cups water + additional
1 1/2 tbsp Miso paste
50 g silken tofu
1 sprig green onion, chopped to 1 cubic cm
2 sprigs cilantro, roughly chopped
Procedure
In a large pot, combine steamed rice with water and bring to a boil for about 2 mins. Reduce the heat to medium and let it bubble and thicken, roughly 15 - 20 mins, stirring every so often. Make sure to try a grain of the brown rice to see that it has broken down. The porridge should look sludgy and pasty and starchy and, well... like porridge (as my mom would say).
Add the miso paste and stir to incorporate it homogeneously throughout. Break up the tofu by hand into the congee, then add the onions and cilantro and stir, about 3 - 4 mins. The congee can be eaten as is, or served with the dish below:
Walnuts and Chives
Ingredients
Canola oil
1 glove garlic, finely minced
1 cup chives, chopped 2 cm length
Large handful of walnuts
Salt and pepper to taste
Procedure
In a skillet on medium high heat, fry up garlic until slightly browned, then add chives. Reduce heat to medium. When chives start to wilt, add walnuts and toss around so that the juices cover them. Take skillet off heat, add salt and pepper (or some chili flakes or your favourite spice) and toss again so that the spices coat everything.
Enjoy with a nice big bowl of congee :-)
Aug 18, 2012
Bird's Nest Breakfast Cups (Baked Bacon and Eggs)
My family loves breakfast. While we like cereals because of its convenience, we don't want to have it on a daily basis. It becomes boring that way. Also, we don't want to miss out on other breakfast goodies. So I cook breakfast as much as I can so we can try new dishes.
Here's an easy but delicious breakfast that needs no big intro. If you love bacon and eggs, this is for you! It is also a Mexican-inspired dish - using Mexican cheese blend, a little cayenne pepper plus cilantro and tomatoes. Most of all, it's low carb and gluten-free! I wish it's breakfast again!
I only made about 5 servings (5 pieces) for this recipe because I have a small family but you can easily double the recipe if you want to make more.
Ingredients
10 bacon strips
5 eggs
3/4 cup shredded reduced-fat Mexican Taco Cheese Blend
A pinch or two of cayenne pepper (optional)
Salt and pepper, to taste
Fresh cilantro, coarsely chopped
A few tomatoes, chopped
Procedure
Preheat the oven to 350F / 180C.
In a large skillet or grill pan, cook bacon over medium heat for 3-4 minutes per side or until it begins to brown but is not yet crisp (still pliable).
While you are cooking the bacon, whisk the eggs until combined.
Stir in the shredded cheese. Season with a little salt and pepper and a pinch or two of cayenne pepper, if using.
Grease the muffin pan - I only used about 5 cups. For this I used the Demarle Flexipan so I did not need to grease the insides of the muffin pan but you may need to grease if you are using regular muffin tin.
Place and wrap two bacon strips around the side of each muffin cup.
Using a measuring cup, pour in the egg mixture in each prepared cup. Just divide it evenly among the cups.
Bake for 18-20 minutes or until set. Remove from the oven and cool for 5 minutes. This is when the magic of a Flexipan comes through. See how easy it is for me to remove the baked egg cups. You can probably just push out the muffin too 'cause the muffin pan is so flexible. Here I used plastic utensils to help me scoop it out.
Transfer to a serving plate. Garnish with some chopped cilantro and have it with fresh chopped tomatoes. Low-carb, gluten-free and what a delicious breakfast!
If you wish to print the recipe, there's a print icon at the end of the post. Click on the "remove images box" for easy and convenient printing.
If you like what you see and would like
to receive new recipe updates we'd love you to subscribe to our posts and join
our site. Also do like us in Facebook so you can get the latest updates and so
much more. Thanks for visiting and happy browsing!
Aug 16, 2012
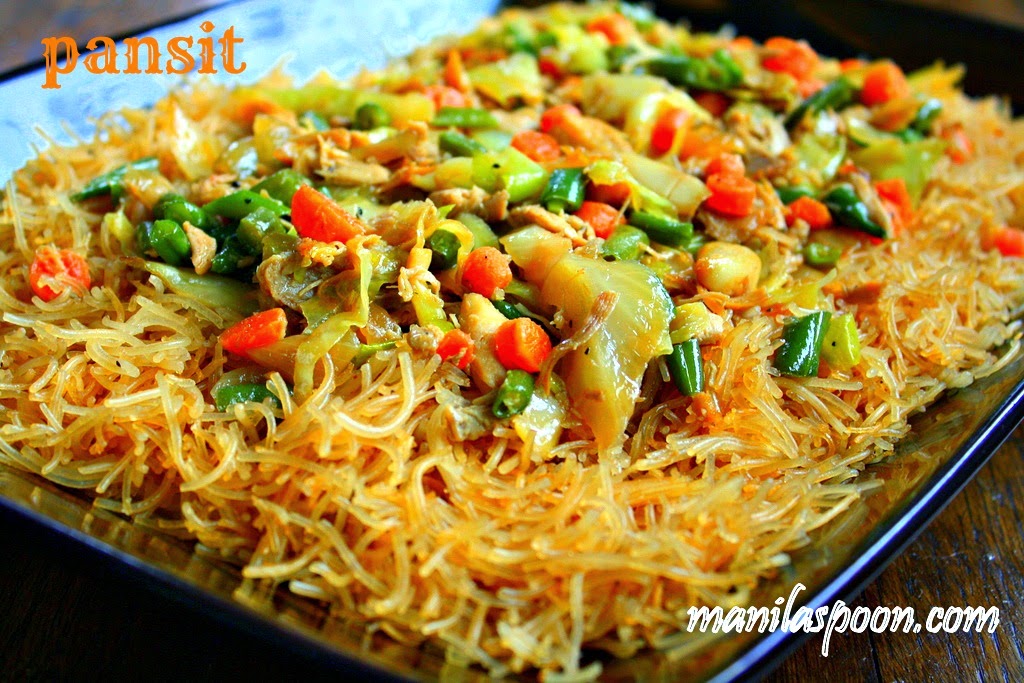
Pancit / Pansit (Philippine Noodle Dish)
I don't think you'll ever find a Filipino who doesn't love pancit. Come to any birthday party, anniversary party, or whatever reason you may have to celebrate this dish is sure to be there. We eat it anytime of the day - lunch, dinner, snacks and, yes, even for breakfast. Well, at least I do! It's just my number one comfort food.
My mom makes the best pancit and am so proud to say it! Ask anyone from Gasan, Marinduque particularly those who have studied at Gasan Central School and they are sure to agree. So, everytime my mom visits me in the US, she is required to make this for us many times (at least once a week!) . The problem though is that my mother never uses any kind of measurement when she cooks. She just has the knack for it! She knows how much ingredient to put in to achieve the perfect balance of saltiness with a small hint of sweetness. I do miss her cooking when she's away!
I try my best to promote Filipino recipes whenever I can so when we have people over, I always have pancit on the menu. So far, no one has ever complained (or gotten sick!) and a few have even requested for the recipe. Also, it is gluten-free, no need to use wheat for this recipe.
Here's my attempt to do Pancit. I have specific measurements here to leave out any guesswork but let this serve as your guide and tweak it to your liking. Hope you like it!
1-2 Tbsp olive oil
4 garlic cloves, chopped
1 onion, chopped
Shredded cooked (pre-boiled) chicken - (Use 1 breast or 2 thighs).
1 1/2 cups of any two of these veggies, chopped (except for snow peas): carrots, green beans, snow peas and cabbage (I prefer using carrots and green beans)
2 (8 oz) packs of Pansit Bihon (Rice Noodles)- can be found in Asian stores - look for the Philippine brand.
Note: If you do not have wheat or egg allergy try this 2 noodles combo - replace one pack of Bihon noodles with another 8 oz pack of Pansit Canton (Egg-Wheat Noodles) Philippine Brand. Of course, you can use other Asian brands but the Philippine brands I have tried and tested for this recipe. Other Asian brand of noodles (especially the Bihon variety) may take longer to cook and may have to be soaked in water first before using.
For the sauce:
5 Tbsp dark soy sauce (regular or wheat/gluten-free)
1 1/2 Tbsp oyster sauce (regular or gluten-free)
2 tsp sugar
Salt and pepper, to taste
Procedure:
Boil the chicken breast or thighs in just a little over 3 cups of water (or enough water to cover the meat). Cook until tender. Reserve about 3 cups of the stock. When the chicken is cool enough to handle, shred them or chop into small pieces. Set aside.
Heat oil in a big wok. Saute garlic and onion for a minute. Add the cooked chicken and season with a little salt and pepper.
Stir in the veggies and cook for another 3-4 minutes or until a little tender.
Pour about 2 1/2 cups of the chicken stock into the wok. Season with the soy and oyster sauces and sugar. Bring to a boil.
When it begins to boil add the rice noodles. Stir to ensure it gets soaked in the sauce. When it starts to soften a bit stir in the egg/wheat noodles/Canton (if using). Continue to stir the noodles while trying to soak them in the sauce until all the liquid has dried up.
Add some more stock or water if the sauce dries up before the noodles are tender. Adjust seasoning if necessary. Don't forget the calamansi (or lemon/lime) - squeeze a few drops on your noodles for some tang! Enjoy!
If you wish to print the recipe, there's a print-friendly icon below the post. Click on the "remove images" box for easy and convenient printing.
If you like what you see and would like to receive new recipe updates we'd love you to subscribe to our posts and join our site. Also do like us in Facebook so you can get the latest updates and so much more. Thanks for visiting and happy browsing!
Aug 13, 2012
Sautéed Ground Pork with Asian Long Beans and Potatoes (Ginisang Sitaw at Patatas)
Sautéed Ground Pork with Asian Long Beans and Potatoes...quite a mouthful, isn't it? I wish the English name of the recipe is as short as the Tagalog (Filipino) one. Oh well, we don't want to be lost in translation, right? J
Of late, I feel like I have been baking a lot (some of the recipes are still on the testing stage but hopefully will get uploaded later). That explains the few pounds I have gained this summer! So, I thought I better go back to my Filipino diet, mostly gluten-free of course, but unfortunately, involving lots of carbs. We do eat rice at least three times a day in the Philippines! And I have not included the rice snacks we have and an additional meal (yes, meal not snack) between lunch and dinner which, guess what, involves "cold" left-over rice (sorry, the Tagalog name escapes me at the moment) paired with some meat-and-vegetable dish. Today, I wanted to have rice with my dinner. But what shall I have with it?
The other day I found some Asian Long Beans (also called "Snake Beans" - how scary!) or Sitaw (known as Kibal in my province) in the Asian store and, of course, I bought it. I only usually see this during summer so I took a bunch home to cook later. Not only did I find long beans, I even found the lovely purple ones! (Unfortunately, they lose their lovely color once cooked but the crunchy texture and delicious flavor are retained thankfully!)
Usually, I would pair this with my favorite veggie - the Squash! - but I didn't have any. The only vegetable left on my kitchen were a few pieces of red potatoes which really needed to be used right away. I thought it might be a weird combination for while we love potatoes and use them a lot in the Philippines, in my house we have never tried to combine it with Sitaw. Oh well, there's always a first time. And at least I'll finally know if they can go together. And they married perfectly in this dish! The starchy potatoes worked really well with the crunchy Sitaw. I loved the flavor combo and the texture which both veggies have imparted to the dish.
Of course, it won't be complete without the sautéed ground pork (Ginisang Giniling). The sautéed ground pork is always the base for many of our dishes especially in our household. I always combine it with veggies like squash, beans, cabbage, potatoes, etc. Here is a link for the Giniling recipe.
Usually, I use about half of the Giniling recipe but feel free to use the entire one if you like. Just add more veggies!
Ingredients
Half the Giniling Recipe
1/2 to 1 whole bunch of Asian Long Beans (some bunches are bigger than others)
3-4 medium red potatoes
Extra soy sauce, salt or fish sauce to season the dish. Choose your fave seasoning!
Ground Pepper (may be added too)
Procedure
Rinse the beans and potatoes before using.
Snap the beans in 2-inch pieces by using your bare hands. They will naturally snap when you try to bend them. Easy! I also snap-off one of the ends of the beans (the rounded end not the tail).
Peel the potatoes and cut them into cubes.
If you have just cooked the Giniling (meat is already tender and flavorful), you can immediately add these veggies to the mix and then cover and cook until tender roughly 10-15 minutes.
If not, warm up the giniling recipe first (if it's been cooked beforehand).
Once it begins to simmer or is about to reach boiling point, add in the vegetables. Spread them in the pan to get an even cooking. Cover and simmer as above for about 10-15 minutes or until the potatoes are tender and the beans fully cooked yet still retain some crunch.
If it dries up, add some water and adjust the seasoning with either salt, soy sauce or to impart more flavor - fish sauce (But it is rather smelly so don't cover the pan until the lovely aroma of the fish sauce has disappeared, just a few minutes. Trust me, it's worth it!). I add ground peppers too for more flavor!
Needless to say, it's perfect with rice! Enjoy!

Aug 9, 2012
Blueberry Sour Cream Cake
My favorite summer/American fruit has got to be blueberries. Not only is it delicious, it is also very nutritious! Full-packed with anti-oxidants and considered a super-food, it's got to be on the top of any must-eat-this list.
I love the fact that it is so easy to pick and eat as well. While other fruits can be cumbersome to peel and cut up, not with my fave berry - just wash them and they're good to go! I know it sounds lazy, but isn't that a good motivation to get some of your required daily 5 servings of fruits?
I may be biased but I think Michigan Blueberries are simply the best. I have tasted some blueberries from other state, especially during the off-season, and they're not as juicy and sweet as the Michigan ones. I don't know, I could be wrong but this is what my taste buds tell me. Blueberries from Michigan are reason enough for me to spend the summer in this lovely state. That's why when we get the chance and the tots are up to it, we go blueberry picking.
Blueberry Sour Cream Cake baked in a Demarle Sunflower Mold.
Try this light but tasty blueberry cake this summer. Have it for dessert or with your coffee and if you're Brit, like my hubby, have it with cream too. For him, everything tastes even better with cream! I must agree!
Ingredients
2 cups flour plus 2 Tbsp extra (separated)
1 1/2 cups sugar*
2 tsp baking powder
1/2 tsp salt
1 cup / 8 oz sour cream (you may sub plain or Greek (plain) yogurt)
2 large eggs
1/2 cup olive oil (light or the fruity version)*
1 tsp vanilla
1 1/3 cups fresh blueberries (rolled into the 2 tbsp flour)
*You can lessen the sugar and make it to 1/4 cup less especially if you are adding a Lemon glaze otherwise the regular measurement is fine.
*You can sub with regular vegetable oil if you don't have Olive Oil.
Procedure
Preheat oven to 350F/180C. Lightly grease a bundt pan.
In a large mixing bowl,combine all the dry ingredients. Set aside.
Roll the blueberries in the 2 tbsp flour until coated.
In another bowl, beat the eggs with the sour cream just until combined. Pour in the oil and the vanilla and mix.
Mix the wet ingredients with the dry. It will be a thick batter.
Fold in the berries.
Transfer the batter to the prepared pan. Bake for about 40-45 minutes or until a tester inserted in the middle comes out clean or with only a few crumbs clinging to it.
Let it cool in the pan for at least half an hour before transferring it to a wire rack to cool completely.
Sprinkle with confectioner's sugar if you like. Enjoy your delicious blueberry cake! If you fancy doing a bit more to it - why not drizzle some Lemon-Glaze on top to provide extra tang and yumminess! Just lessen the sugar in the batter by 1/4 cup if you decide to add the glaze and it's the perfect combination of sweet and tang or if you prefer just make it as usual. Either way it's fantastic!
For the
Lemon-Glaze
1 cup, confectioner's sugar (powdered sugar)
2-3 Tablespoons Lemon juice (depending on the tartness and thickness of the glaze that
you prefer so feel free to adjust).
2-3 Tablespoons Lemon juice (depending on the tartness and thickness of the glaze that
you prefer so feel free to adjust).
Place the powdered sugar and lemon juice in a mixing bowl. Beat until it reaches a smooth and pourable consistency. Easy! Let the cake cool completely before you add the glaze.
If you wish to print the recipe, there's a print-friendly icon at the end of the post. Click on the "remove images box" for easy and convenient printing.
If you like what you see and would like to receive new recipe updates we'd love you to subscribe to our posts and join our site. Also do like us in Facebook so you can get the latest updates and so much more. Thanks for visiting and happy browsing!
"Be merciful to me, O God, be merciful to me, for in you my soul takes refuge; in the shadow of your wings I will take refuge, till the storms of destruction pass by." Psalm 57:1
Subscribe to:
Posts (Atom)
©
Manila Spoon | All rights reserved.


