Nov 28, 2012

Lumpiang Shanghai (Filipino Spring Rolls)


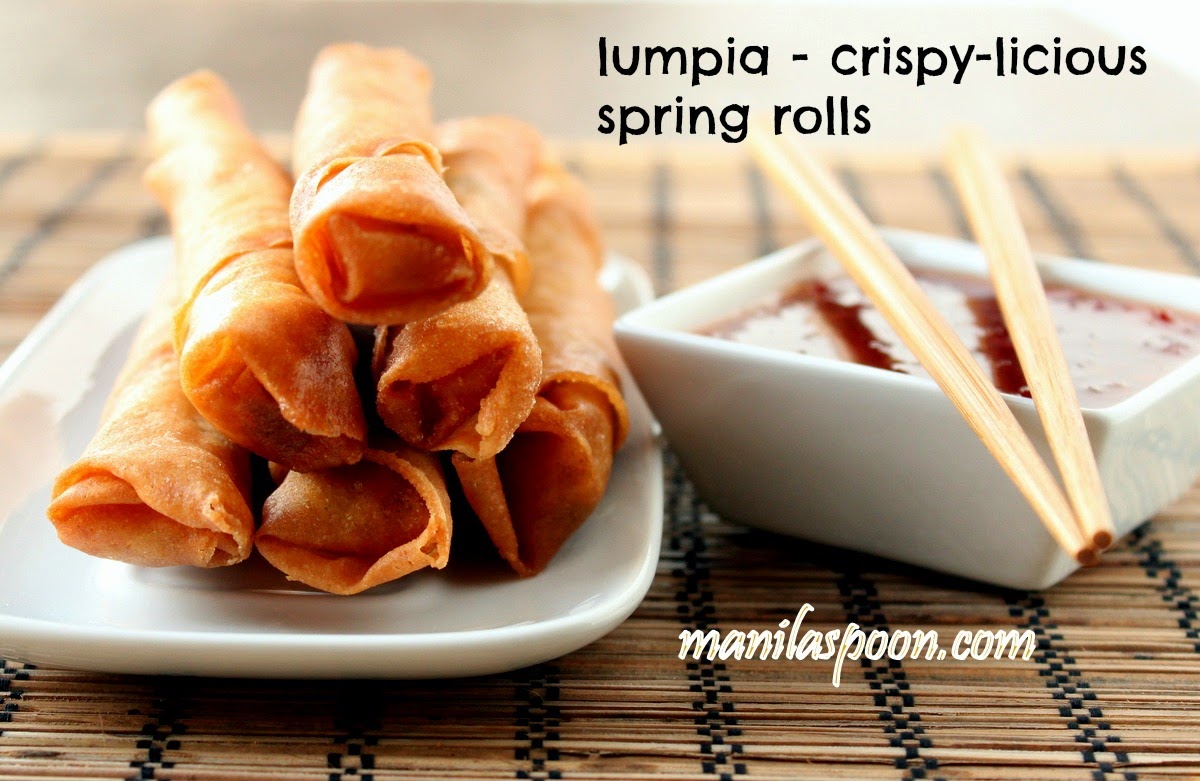
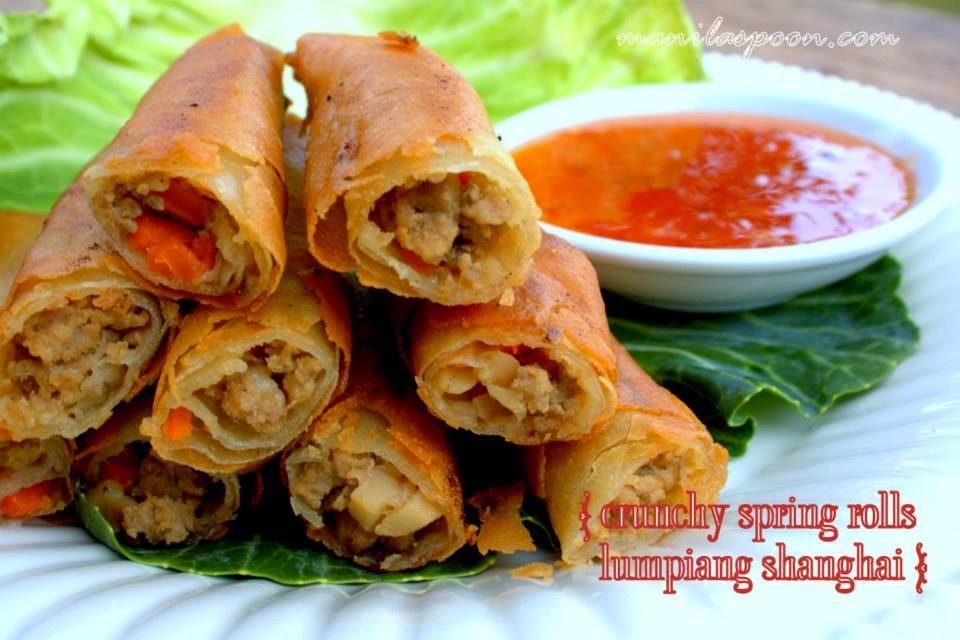
Lumpiang Shanghai or Filipino Spring Rolls are traditionally made of ground meat (usually pork), minced onions, finely chopped carrots and seasoning all rolled up in a paper thin wrapper made with flour and water. It is sealed at the end either by using  a sticky beaten egg or plain water.

By the name it is given, you can almost guess that it has its origins in China though for some reason we haven't dropped the "Shanghai" at the end and continues to use it to this day. I suppose the reason for this is to differentiate this from the other kind of Lumpia which uses mostly vegetables (though occasionally with a little meat tucked in) as filling. So when you simply say Lumpia, people will tend to think you mean the plumper and bigger spring roll rather than the "Shanghai" which is a smaller and meatier one.

Lumpiang Shanghai or Filipino Spring Rolls are traditionally made of ground meat (usually pork), minced onions, finely chopped carrots and seasoning all rolled up in a paper thin wrapper made with flour and water. It is sealed at the end either by using  a sticky beaten egg or plain water.   By the name it is given, you can almost guess that it has its origins in China though for some reason we haven't dropped the "Shanghai" at the end and continues to use it to this day. I suppose the reason for this is to differentiate this from the other kind of Lumpia which uses mostly vegetables (though occasionally with a little meat tucked in) as filling. So when you simply say Lumpia, people will tend to think you mean the plumper and bigger spring roll rather than the "Shanghai" which is a smaller and meatier one.

In the Philippines, perhaps next to Pancit, Lumpiang Shanghai has got to be the most common dish you will find in any kind of celebration - whether it be a wedding, birthday, reunion or a simple get-together. The reason is that it can be made in bulk and ahead of time! True, it takes a bit of effort to make it (fancy making spring rolls for an hour or 2?) but when you make a lot of it - you don't need to make other extra dishes because everyone goes for the spring rolls! Besides, since you can actually make this at least a day ahead or even weeks ahead if you freeze them, then it's actually a very practical dish to make. So despite some labor required it does save time in the end and less stress in thinking of what other dishes to prepare. So make a huge batch, freeze and serve it whenever you need it!

Of course Lumpiang Shanghai is best eaten with a sauce. I usually prefer the sweet chili sauce, the kind that you find in any Asian store. In the Philippines though, it is often served with our favorite ketchup - Jufran Banana Ketchup! Yes, such a ketchup exists and I love it!


I always pre-cook my meat fillings for lumpiang shanghai so I take the guess work out of the equation (did the meat cook properly? did I season the mixture enough?) and my mother always did, so I wanted to play safe too! It maybe a bit labor intensive this way, but at least you’ll be guaranteed the results and no need for the rolls to really soak up all the oil in the deep fryer. Nonetheless, there are lots of ways one can cook lumpiang shanghai and they can all turn out yummy, too. Here’s my version which has always worked for me (even my little tots love it). It’s easy enough to tweak to suit one’s palate. And yes, if you bring this to a party, you'll be the star, well - at least the dish will be! :-)

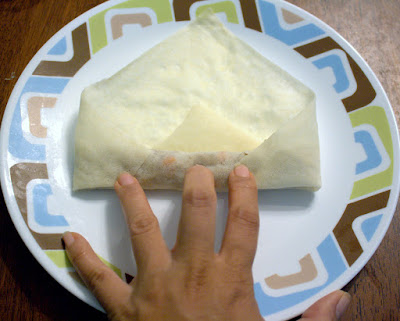
Here's a quick photo tutorial on how to make the spring rolls. Details of the method can be found on the recipe below. 


Then, fry and enjoy!!!


Don't forget to serve with some chili sauce or even ketchup will do.

If you like what you see do subscribe to our posts via email. You can also like us in Facebook or  join us on Pinterest so you can get the latest recipes and so much more. Thanks for visiting and happy browsing! 


Print Friendly and PDF

Lumpiang Shanghai (Filipino Spring Rolls)


That these are the best spring rolls is no exaggeration. Whenever I serve these Lumpia, they're gone in seconds. True crunchy deliciousness in every bite. Bring these Lumpiang Shanghai to your next party and you'll be the star!

That these are the best spring rolls is no exaggeration. Whenever I serve these Lumpiang Shanghai, they're gone in seconds. True crunchy deliciousness in every bite. Serve with a sweet chili sauce!

Ingredients

  • 1 kilo / 2 pounds ground pork
  • 8 garlic cloves, finely chopped
  • 2 small Onions, minced
  • 1 big or 2 medium size Carrots, finely chopped
  • 5-6 tablespoons Soy sauce or to taste
  • 1 Jicama (Singkamas) or a small tub of Water Chestnut, finely chopped (optional – but I do love the extra crunch and flavor either brings!!!)
  • Salt and Pepper, to taste
  • Oil for frying (enough to cover the rolls)
  • 2 packs of paper thin Spring Roll wrappers (can be found in Asian stores), thawed

Instructions

  1. Heat a little oil in a frying pan on medium heat. Saute the garlic just until aromatic (less than a minute). Brown the ground pork in the pan and season with a little salt and pepper (just to give the meat a little flavor so go easy with the salt). Stir the meat to prevent clumping.
  2. When the meat has changed its color add the onions. Cook for another 3-4 minutes or until the chopped onions have softened. Add the carrots and season with the soy sauce. Stir to mix. Lower the heat and simmer for about half an hour (to allow the meat to absorb the seasonings). At this point, I add the water chestnuts or jicama and just let it cook for another couple of minutes. Adjust seasoning to your taste. Set aside to cool down. Drain completely to remove any excess liquid. I use a strainer to do this. It should be dry and not dripping with sauce. 
  3. Prepare the spring roll wrappers and have a small bowl filled water near you. Place about 1 heaping tablespoon of the cold pork mixture in one of the corners of the wrapper. Spread the filling into the wrapper horizontally. Roll the meat mixture towards the middle. Fold both sides inward to seal, then continue to roll until you have about an inch left of the wrapper. Using your finger, brush the edges with a little water to seal completely. Make sure it is tightly secured. Place the finished roll on a deep baking dish (casserole) with the sealed side downwards. Repeat until all the meat is gone. To ensure that the seal does not open while you are frying it, I keep the rolls overnight in the refrigerator. This way they seal properly and won't open when frying.
  4. Before you heat the oil, take the spring rolls out of the fridge so it will be a little warmer when you fry it. (Others have fried it from frozen, I heard). Pour cooking oil (enough to cover the rolls) in a deep pan and turn heat to medium and let heat up for about 10-12 mins. (If you have a deep fryer, preheat to about 350 F). To make sure the oil is hot enough, test one roll and see if it browns quickly. Fry the lumpia in batches until they turn golden brown. This shouldn’t take too long if the oil is hot enough and because they have been previously cooked. Do not overcrowd the rolls to allow them to brown evenly.
  5. Place the cooked rolls in a strainer with paper towels to drain the oil while the other rolls are cooking. Transfer the cooked ones in a serving dish. You may again wrap them in paper towels to extract any remaining oil.
  6. To double the amount, cut the rolls in half. Serve with sweet chili sauce, a yummy chutney or even plain old ketchup as dip! Yum!
Yield: 60-80 pieces depending on the size
Prep Time: 30 Minutes
Cooking Time: 30 Minutes
Total Time: 1 Hour


That these are the best spring rolls is no exaggeration. Whenever I serve these Lumpia, they're gone in seconds. True crunchy deliciousness in every bite. Bring these Lumpiang Shanghai to your next party and you'll be the star!

Share:

Nov 24, 2012

Cranberry Chocolate Chip Cookies

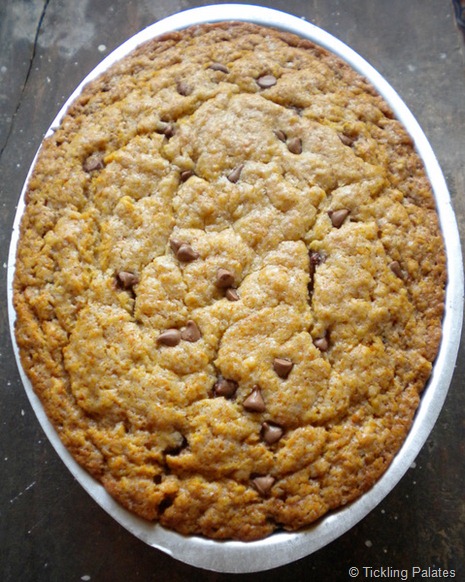
Cranberries give these yummy cookies a fresh tangy flavor which perfectly contrasts with chocolate and cinnamon spice! A great holiday snack for Thanksgiving, Christmas and New Year! | manilaspoon.com

It's beginning to look a lot like Christmas...so the song goes and that's why I was inspired to finally make some holiday cookies! Without much further ado - here's a cookie that's chewy, sweet with a hint of cinnamon and with the refreshing taste of fresh cranberries all rolled into one delicious Cranberry Choco Chip Cookies! Perfect for the holidays and as a lovely gift for family and friends!

Cranberries give these yummy cookies a fresh tangy flavor which perfectly contrasts with chocolate and cinnamon spice! A great holiday snack for Thanksgiving, Christmas and New Year! | manilaspoon.com


If you're making this over the summer, you can replace the cranberries with fresh or dried cherries.

Ingredients

1 1/2 cups flour
1 tsp baking soda
1 tsp cinnamon
1/4 tsp nutmeg (optional)
1 tsp salt
3 cups rolled oats (I used quick cooking oats)

3/4 cup unsalted butter, softened or room temp (1 1/2 sticks) - (if using salted butter lessen the salt to 1/2 tsp)
1 cup dark brown sugar, firmly packed
1/4 cup white sugar
2 eggs
1 tsp vanilla extract

1 cup fresh cranberries, coarsely chopped (Yes, the fresh ones are better.)
1 cup semi-sweet chocolate chips

Procedure

Preheat the oven to 350 F.
Prepare two cookie sheets. Grease or line them with parchment paper.

Sift into a big bowl  or whisk together  the flour, baking soda, cinnamon, nutmeg and salt. Add the oats to the flour mixture and mix well.


In a mixing bowl, beat together the butter, sugar, eggs and vanilla extract just until combined. My butter was already melted when I combined it with the other ingredients that's why it looks like this - more liquidy (I was in a hurry and had to melt them instead). However, if you have the luxury of time - room temp butter (softened) is so much better because the cookies would be more chewy and moist. If the butter is just softened it will only melt while at the oven hence the cookies retain more moisture. The taste will be the same either way though.


Add the egg mixture to the dry ingredients. Mix well until all the ingredients are moist.


Fold well into the batter the  chopped cranberries and chocolate chips. Drop the mixture by rounded tablespoons onto the greased cookie sheets. An ice cream scooper is so helpful for this. I used a large one. Do not flatten the cookies. Bake for 10-12 minutes (depending on how big your cookies are, mine were big so I cooked for about 12 minutes but if you use a tablespoon as measurement then 10 minutes is perfect!) or until lightly browned. Do not overcook.


Let stand for 5 minutes before you transfer to a wire rack to cool completely. They will be quite soft so you need to let them sit a bit. Makes between 50-55 cookies if you are using a rounded tablespoon. I used a large ice cream scoop the first time so I only managed to make about 2 dozen but the cookies were huge.


Perfect Christmas cookies in my opinion. Chewy, moist and delicious! If you wish to print the recipe, there is a print icon below the post. Click on "remove images" box for easy and convenient printing. Happy Baking!

Cranberries give these yummy cookies a fresh tangy flavor which perfectly contrasts with chocolate and cinnamon spice! A great holiday snack for Thanksgiving, Christmas and New Year! | manilaspoon.com


Cranberries give these yummy cookies a fresh tangy flavor which perfectly contrasts with chocolate and cinnamon spice! A great holiday snack for Thanksgiving, Christmas and New Year! | manilaspoon.com

If you like what you see and would like to receive new recipe updates, we'd love you to join our site or like us on Facebook. Happy Browsing!
Share:

Nov 22, 2012

Cranberry Banana Muffins with Chocolate Chips


As we celebrate Thanksgiving, we were reminded of our trip to Plymouth, Massachusetts back in July, 2005. Abigail was six months pregnant with William and we took advantage of the chance to travel to New England before the baby arrived. We chose to go to Plymouth because we wanted to visit the site where the Pilgrims first settled and learn about their history. We were so impressed by the courage of the Pilgrims in the face of many hardships that we were inspired to name our son, William, after William Bradford the second governor of the Plymouth Colony. During their arduous 60 day sea crossing Bradford wrote in his journal, "All great and honourable actions are accompanied with great difficulties and must be both enterprised and overcome with answerable courages". Their Christian faith enabled them to perservere in the midst of great adversity and establish a community where they were free to worship God according to His Word.


While in Plymouth we stayed at the Governor Bradford Inn. It overlooks the historic Plymouth Harbor where the Plymouth Rock and Mayflower II are located.


The Mayflower II is a reproduction of the original Mayflower vessel. It has been recreated to give a sense of what the original 17th century ship was like. Seeing the inside of this very small vessel meant to carry only about 50-60 passengers, (there were about 104 on board), we were amazed at how the Pilgrims managed to survive the journey. We also saw the cramped passengers' quarters, the "hold" where they stored food, clothing and other items needed to start the colony, and the very crude tools used in 17th century navigation. The photo below  shows the Mayflower II journeying from Plymouth, England to Plymouth, Massachussets in 1957.


On board the Mayflower II, you will meet actors dressed in period costumes speaking in 17th century English who will share with you what life was like during the voyage. We met Captain Myles Standish, the military advisor for the Plymouth Colony. He shared with us his experiences while on board and the death of his wife Rose upon arrival at Plymouth.

A monument to the Pilgrims who died during the first year in the Plymouth Colony.
Over all, it was a very successful trip and we're glad we went. It is a trip that is a highly recommended.


Now to a lighter note, here's a lovely recipe that's great for the holidays - Cranberry Banana Muffins.


Ingredients

1 cup plus 3 Tbsp sugar (I use white)
2 cups flour
2 tsp baking powder
1/2 tsp salt
2 eggs (room temp)
1 cup plain yogurt
1/2 cup banana, mashed (about 1 1/2 bananas - you can use 2 bananas if you prefer)
1/4 cup light olive oil or vegetable oil
1 tsp vanilla (optional)
1 cup cranberries, coarsely chopped
1/2 cup chocolate chips or pieces (optional)

Procedure

Preheat oven to 400 F.

Mix all dry ingredients. Set aside.

In a large mixing bowl, crack the eggs and beat lightly just until combined. Add in the rest of the wet ingredients (yogurt, banana, oil, vanilla) and continue to beat in medium speed until it's smooth and there are no big banana lumps roughly 1-2 minutes.

Adjust the speed to low and then slowly pour in the flour mixture. I try to do this in three parts to prevent the flour from splattering all over the place. Scrape the sides with a spatula after adding each flour. When everything is just combined, stop the the mixer. Fold in the cranberries and the chocolate chips/pieces, if using.

Divide evenly into a 12-cup muffin pan with liners. Bake at 400 for about 18-22 minutes or until a tester comes out clean. Oven heating/temperatures vary so adjust the time accordingly. I use a Demarle Flexipan - the muffin cooks faster here so you may have to adjust the time a bit if using a regular muffin pan. Let this serve as a guide. A friend of mine who made this recipe said it took about 22 minutes for her muffin to fully cook.

Leave it to cool a bit in the pan for about 7-10 minutes and then transfer to a rack to cool completely. The muffins may feel soft when you lift them up but don't worry they will harden as they cool down.

I love that this is just a balance of sweet-tart flavors and comes out really moist even after you have left it standing for a few hours. On occasion when I am feeling rather indulgent, I add 1/2 a cup of chocolate chips! Moist and delicious cranberry muffins!

If you like what you see and would like to receive new recipe updates, we'd love you to join our site or like us on Facebook. Happy browsing!


Share:

Nov 20, 2012

Easy Homemade Fluffy Pancakes


Who doesn't like pancakes or, shall I say hot cakes, as we call them in the Philippines? Making these simple pancakes continue to bring me lovely memories of my childhood in our little island, Marinduque. As I have said in my previous post, when we were growing up we didn't have a consistent supply of electricity in our town which was the main reason why people never really had electric ovens and mostly relied on charcoal (out of wood or coconut) to cook our food. Thankfully, because pancakes are generally cooked on a stove top, we still got the chance to have them typically on Saturdays for a wonderful weekend breakfast treat.

Obviously, we don't have maple syrup in Asia so to sweeten our pancakes - we either use honey or in my cousins' house -  we use sugar (brown or white) with evaporated milk. Delicious!

Fortunately for me, I always seem to know when they are making pancakes 'cause I'm always at their house when they make it. Our houses are so close to each other so perhaps the sweet-smelling aroma of the pancake batter makes me rush to their place on Saturdays! :-) Truth is, in the Philippines, you don't need any formal invitation to go to someone's house. It's a cultural thing, a socially accepted norm, especially if it's your relatives house. People come and go unannounced. While this may be unnerving or shocking to some - like akin to an invasion of privacy, it is not so in the Philippines or perhaps in other parts of Asia. It's to be understood in the context of what Filipino hospitality is all about. When guests arrive at your house, although unannounced, you are expected  to offer them something to eat. While it sounds terrible - it really is not - these visitors don't really expect to be served like Kings and Queens. Often the purpose is just to visit and have a chat. No need to serve them anything eleborate. More often than not a quick trip to a Sari-sari Store (Filipino style convenience store - see photo below) is all that's needed. They'd be happy with a bottle of Coke and skyflakes (Filipino Crackers). They come to visit and chat, see how you are doing and as a courtesy to their visit - you need to at least offer something. In the end, it's just wonderful to have an informal get together with family and friends unhampered by any rigid rules.

Image:Sari-sari store.jpg
A typical Sari-Sari Store
(Photo courtesy of Manila Daily Photos)


Anyway, that's a little snippet of our culture which I truly appreciate having been the beneficiary many a times of such warm hospitality. In case you are wondering, today I am still very good friends with my cousins despite my contant visits and many meal times shared with them! I love them and they love me back! :-)

Anyway, we digress, let's go back now to our simple evaporated milk and sugar sweetener. It may sound weird and it's not exactly a perfect replacement for a sweet syrup but to this day - I still use this when I eat my pancakes. I sprinkle sugar on top of the pancakes and then drown them in evaporated milk. I do it to bring fond memories of laughter around the table while my cousins and I try to outdo each other on who can eat the most pancakes. It's so simple too yet I think it works really well. My kids love it too but they are quite easy to please!

Here's a simple recipe for homemade pancakes. This is just a very basic batter but you can add fruits or sweet spices or whatever suits your fancy. After trying this, I have never bought any mixes anymore. It's just simple and at least you know what's going in your pancakes!  Hope you enjoy this as much as we do.:-)

Ingredients

1 1/2 cups all-purpose flour
2 Tablespoons sugar
3 1/2 teaspoons baking powder
1/4 teaspoon salt
1 1/2 cups milk (less if you want thicker pancakes)
1 egg
3 Tablespoons unsalted butter, melted

Procedure

Sift together the flour, baking powder, salt and sugar in a large mixing bowl. Make a well in the center, place the egg in, then pour in the milk and the melted butter. With a whisk, mix until the batter is free from big lumps or until relatively smooth.

Heat a griddle or frying pan (some pans need to be greased a bit beforehand) over medium high heat. (I use a non-stick griddle so there’s no need to grease it all). When the pan or griddle is hot enough,  scoop the batter onto the griddle/pan using a small measuring cup (1/4-1/3 cup size). Cook until bubbly approximately – 1 to 1-1/2 minutes.


 Flip and brown the other side. Just cook until it's fully set, approximately 1-2 minutes. Aren't they lovely?


Spread some butter on the pancakes and serve with warm maple syrup or your preferred sweetener (or – sprinkle brown sugar on top and for syrup – evaporated milk!)


Definitely, kid-approved!


If you like a more sophisticated pancake for the adult taste, why not add some berries and nuts into the mix - like this blueberry and walnut combo. Recipe link is here for the Fluffy Pancakes with Blueberries and Walnuts.

If you wish to print the recipe, there's a print-friendly icon below the post. Click on the "remove images box" for easy printing.

If you like what you see and would like to receive new recipe updates, we'd love you to join our site or like us on Facebook, follow us on Pinterest or Google+. Happy browsing!


Share:

Nov 16, 2012

Soup and Bread Party - Recipe Round-Up (Part 2)


We had such a successful Soup and Bread Party that we received so many lovely recipes. It was not possible at all to do just one post 'cause it would have been such a long one. So without further ado, here's the Part 2 of our Soup and Bread Recipe Round-up.  As usual, the recipes are posted in the order they were received. Don't forget to check out all these delicious recipes! Enjoy!

Please note: To get the recipe, find the photo below of the yummy sweet treat you are looking for and then click on the link underneath. That should lead you to the recipe. This is a collection of recipes from our blog and other amazing food bloggers.

Share:
© Manila Spoon | All rights reserved.
Blogger Template created by pipdig