Oct 30, 2012

Lumpiang Pabo - Turkey Spring Rolls


Since Thanksgiving is getting nearer I thought I'd share my Filipino recipe for Turkey Spring Rolls. This is a wonderful dish if you wish to do something different with your left-over Turkey. You can opt to fry it, as we would normally do, but if you want a healthier, lower-fat version then you can bake them too! As long as it's crispy, it's good! Also, I added some vegetables with the turkey so it's not an all-meat variety, unless that's what you prefer.

Without much ado, here's - Lumpiang Pabo (Filipino) or in English - Turkey Spring Rolls.


Ingredients

2 tbsp olive oil
3-4 cups cooked turkey, shredded
6 garlic cloves, finely chopped
1 medium size onion, finely chopped
2 cups cabbage, chopped
1 cup carrots, finely chopped (Baby carrots are handy!)
1 cup bean sprouts
1 tub water chestnuts, chopped (optional)
Salt and Pepper, to taste
A few drops of Sesame oil (optional)
Lumpia Skin (Spring Roll Wrappers) - may be found at any Asian store (use the Filipino brand - the paper-thin variety, if you can find them)

For the Sauce to use for the Stir-Fry

Choices: Hoisin sauce (about 4 Tbsp or to taste), Soy Sauce (beging with 2 Tbsp), Oyster Sauce (begin with 1 Tbsp) or a Soy-Oyster combo. I usually eyeball the sauce so let this serve as a mere guide. Follow your taste buds!

I usually pre-cook all the ingredients before I fry or bake them but it’s not difficult to do so provided you’ve got all the ingredients ready.

Procedure

Heat the oil in a wok or a deep frying  pan in medium heat.
Season the oil by adding the garlic and frying it until aromatic, less than a minute. Add the onion and stir-fry for another 2-3 minutes.

Place the shredded turkey in the pan and stir-fry just until heated, 2 minutes more or less.

Raise the heat and add the vegetables and continue to stir-fry until tender, roughly 2-3 mins.


Add the sauce of your choice (I used the Hoisin sauce for this one because I wanted a sweeter flavor); stir until all the ingredients are glazed. Season with a little salt and pepper, to taste. Stir-fry until everything's coated and the sauce has dried up.

Once cooked, add a few drops of sesame oil (optional).


Set aside and cool down for a few minutes. Wait until it’s cool enough cause it will break the wrapper if it’s too hot. It should be pretty dry but if not, just drain. It shouldn't be wet.  


How to make the roll:

Completely thaw the lumpia wrappers before using. Note that the wrapper has the tendency to dry out so to avoid this, place a clean damp dish towel on top of the wrappers after thawing. Just lift up the towel everytime you get a new wrapper for rolling and then put it back in place to keep some moisture in.


Have a bowl of water ready. You will use it to seal the edges of the wrapper together.

Place about 1 heaping tablespoon of the turkey filling on one of the corners of the wrapper as shown. Spread the filling to make it easier to roll them.


Start to roll, tucking the sides inward as you go.


Put a little water to seal the edges securely.


You may cook this right away or leave in the fridge and cook it the next day. You can even freeze these.


Now, you can either deep-fry it (recommended) but if you’re health conscious you may  bake it, too (which I tried to know if it would work). I must admit, the deep-fried ones taste better though baking is a good alternative.

Deep-fry in hot oil (about 350 F) until golden brown. Oil should just about cover the rolls. If the oil is hot enough it should not take long. Cook the lumpia in batches. Allow enough room for each to roll in the oil for an even browning.


Use tongs to lift the cooked lumpia and transfer them to a plate lined with paper towels to absorb the extra oil or place them in a sieve or strainer lined with paper towels too.     I normally line the rolls straight (vertically) on the strainer to allow the oil to drain better.  Below are the rolls after they've been cooked and drained. Don't they look gorgeously golden?


Alternatively, you can bake it in a 375F degree oven and bake until golden brown. Remember, it's already cooked, you just need to brown the skin or wrapper.  Don't forget to brush a little oil on the spring rolls before you bake them.

Of course, it’s not complete without the sauce or dip – choose either the sweet chili sauce or do your own Filipino sauce by combining vinegar, crushed garlic, salt and pepper in a bowl. Dip the rolls in the sauce! Yum!

Wonderful as appetizer or even as a main dish eaten with hot rice!


If you wish to print the recipe, there's a print-friendly icon at the end of the post. Click on the "remove images" box for easy and convenient printing.

If you like what you see and would like to receive new recipe updates, we'd love you to join our site or like us on Facebook. Happy browsing!
Share:

Oct 27, 2012

Giant Oreo Cookie Cake


Since we are having a little celebration at home for my kids' birthdays (William - Oct. 28 and Sophie - Oct. 25), I thought I'd make a quick post of one of their favorite cakes. I normally like to bake from scratch but this cute cake is a great exception to the general rule. I like to make it once in awhile 'cause it's so easy and has always received rave reviews whenever and wherever served. That explains why it has been pinned on Pinterest for over 470K already!

Without much ado, it being one of the most popular cakes on the web - here's the Kraft Chocolate-Covered Oreo Cake, aka - The Giant Oreo Cake!

I followed the recipe to the letter pretty much though I note the particular brand that I use when I make this. Yummmmy!


Ingredients


1 pkg. (2-layer size) devil's food cake mix (Duncan Hines)
4 squares Baking Chocolate, Semi-Sweet (Ghirardelli)
1/4 cup butter                                                                                                         
1 pkg (8 oz) Philadelphia Cream Cheese, softened
1/2 cup sugar
2 cups thawed Cool Whip Topping

12 Oreo Cookies, coarsely crushed

Procedure
HEAT oven to 350ºF.
PREPARE cake batter and bake in 2 (9-inch) round pans as directed on package. Cool cakes in pans 10 min. Invert onto wire racks; gently remove pans. Cool cakes completely.
MICROWAVE chocolate and butter in small microwaveable bowl on HIGH 2 min. or until butter is melted. Stir until chocolate is completely melted. Cool 5 min. Meanwhile, beat cream cheese and sugar in large bowl with mixer until blended. Gently stir in COOL WHIP and crushed cookies.
PLACE 1 cake layer on plate, spread with cream cheese mixture. Top with remaining cake layer. Spread top with chocolate glaze; let stand 10 min. or until firm. Keep refrigerated.


Here's the link to the original recipe from Kraft - Chocolate-Covered Oreo Cookie Cake.

If you like what you see and would like to receive new recipe updates, we'd love you to join our site or like us on Facebook! Happy browsing!


Share:

Oct 25, 2012

Thai Green Chicken Curry


Filipino food is not generally spicy. There's only a certain region in the Philippines which feature a spicy cuisine. So while we do have our own version of chicken curry (at least my family does!), it was never really spicy but relied more on either turmeric or ginger for flavor rather than curry powder or paste.
Share:

Oct 22, 2012

Baked Pumpkin Pancakes


As I have noted in previous posts, my hubby is trying a grain-free diet. Because of this, I am always on the look-out for new recipes that  are gluten-free, preferably, grain-free that I can try and, hopefully, something he would enjoy too. Sometime, last week I was browsing my Manila Spoon news feed when lo, and behold, this yummy recipe for Baked Pumpkin Pancake caught my eye! I was not about to forget this link so I made sure I pinned it to my Favorite's Bar so I can go back to it when I am ready to make it.

So I finally tried the recipe and what a rave review it received from my honey and, needless to say, from me! I made very minor modifications - only because I did not have the exact ingredients as stated in the original recipe. Regardless, it is such an awesome dish that whatever nutty butter or sweetener you use, it's sure to come out good. Also, just to experiment I added some choco chips and raisins on top of the pumpkin batter just before I baked them. They came out great. Mark especially loved the ones with choco chips, who wouldn't? At any rate, with or without toppings these pumpkin pancakes are great for my tummy!

I am so indebted to Ann of "The Fountain Avenue Kitchen" for this amazing recipe. Click on this link for the original recipe and while you're there do check out her blog. She is one amazing cook and has loads of recipes which are definite gustatory delights.

Also, please pardon if the pictures don't do justice to these lovely pancakes. Don't let the not-so-perfect-shots turn you off.  My usual camera is having some issues so I had to rely on the IPhone for these shots. If you ask me though, the phone has done a decent job! Don't you think?

So, what are you waiting for? Try this great pancake recipe which is truly perfect for Fall. Enjoy!

Ingredients

2 eggs
1/2 cup 100% pumpkin puree (not pumpkin pie filling)
1/2 cup crunchy Peanut Butter (or Almond Butter)
1 Tablespoon  Agave Nectar (or Honey / Maple Syrup)
1/2 teaspoon cinnamon
1/4 teaspoon freshly grated nutmeg
1/2 teaspoon Gluten-free baking powder
A few pieces of Gluten-free Chocolate chips or Raisins for topping (optional)
Maple syrup or preferred sweetener for serving, if desired
Procedure
Preheat oven to 350F and line a baking sheet with parchment paper. I used my silpat so the parchment was unnecessary.
In a medium-size bowl, lightly beat the eggs. A Pyrex measuring cup, as suggested in the original recipe, makes it easy to pour the batter. Quite handy, indeed.  Stir in the pumpkin and the remaining ingredients and mix well.
Pour by 1/4 cupfuls onto the prepared baking sheet and bake for 10-12 minutes or until the pancakes are just cooked through and fluffy. I placed some choco chips and raisins on some pancakes before I baked them.
Serve with maple syrup or sweetener of your choice, if desired. Yummylicious!
 If you like what you see and would like to receive new recipe updates, we'd love you to join our site and like us on Facebook. Thanks for stopping by and happy browsing!

This recipe is featured at Wednesday Extravaganza
Share:

Oct 20, 2012

Moroccan Chicken Tagine


My husband and I have done some travelling both before and after we got married. We love to experience different cultures, get to know different folks and of course, try new cuisines. Once in awhile I try new recipes from other countries, especially the ones which we have had the chance to visit. It makes us feel like we are back in that country whenever we eat their food.

One of our favorite places to shop is the World Market because it gives us the chance to sample certain products from around the world. One time I saw this Tagine from one of their stores. A Tagine is an earthenware pot that is used in traditional Moroccan cooking. It is a circular cooking pot with cone-shaped cover that sits on the base during cooking. The dish cooked in it is also called "Tagine." Since Mark has been to Morocco, I thought I'd cook him some Moroccan style dish.


I love this dish because of the flavor imparted by a lovely mix of spices commonly used in Moroccan cooking. It gives the chicken stew a nice robust and complex flavor. The addition of dried fruits give the dish some texture and added sweetness. Since we like to use fruits (esp. raisins) in Filipino dishes, I thought this dish is perfect for me.     

I didn't actually use the Tagine in cooking the stew but used my regular pan instead. However, a Tagine is always used as a serving dish. At least, the dish looks more authentic this way! :-)

So, if you want to try a different kind of dish, I would highly recommend this. Enjoy!

Ingredients

2 Tbsp olive oil
3 cloves garlic, minced
1 onion, finely chopped
1 tsp each ground ginger, cumin, turmeric
1/2 tsp ground cinnamon
2 Tbsp tomato paste
1 1/2 cups chicken stock
Freshly squeezed juice of one orange
7 oz package of mixed dried fruits, chopped
A few Tablespoons of raisins (optional)
Salt and pepper, to taste
1 1/2 lbs skinless boneless chicken thighs, cut up
1/3 cup sliced almonds
Chopped fresh Parsley (optional)

Procedure

Heat the oil to a medium in a large deep pan. Add the garlic and onion. Saute briefly until aromatic, about a minute or less. Do not let the garlic brown. lmmediately, adjust the heat to the lowest setting. Add all the spices and cook gently for about 4-5 mins or until the onion softens.


Pour the orange juice and the dried mixed fruits.  Stir. Season with salt and pepper.


Stir in the tomato paste and the chicken stock. Add the chicken and coat with the sauce. Bring to a boil. It may look quite thick at this point, but don't worry it will produce some more liquid as the chicken cooks. (I prefer the sauce to be thicker rather than runny).


Cover and simmer for about an hour or until the chicken is fully cooked and tender. You may add a little water as you cook it if you find that the sauce is too thick for your liking. Adjust seasoning if necessary.  Sprinkle the sliced almonds for garnish or you can also sprinkle it with some chopped fresh parsley instead. This stew is even better the next day!

If you wish to print the recipe, there's a print-friendly icon at the end of the post. Click on the "remove images box" for easy and convenient printing.


Serve hot with rice and plain yogurt on the side, if desired. Enjoy your Moroccan chicken stew.

If you like what you see and would like to receive updates on new recipes, we'd love you to join our site or like us on Facebook. Thanks for stopping by and happy browsing!


Share:

Oct 18, 2012

Pumpkin Praline Bread

This bread is moist, delicious and with a sweet, nutty praline topping is totally amazing! Fall-perfect - Pumpkin Praline Bread!


Inspired by my Apple Praline Bread, I thought I'd make a pumpkin version of it. After all it's Fall season which means Pumpkin time, too. I also wanted to try a new pumpkin bread recipe. I wasn't sure it was going to work out the first time  I made it but I was pleasantly surprised that it came out well. It was moist and delicious. It was so good that I probably ate half of the loaf (since my hubby is on a grain-free diet and cannot have it - which is not really good for my waist!) while the rest were eaten by the tots.


For this first attempt, I added the nuts only to the Praline topping but, next time, I think I'll add some to the batter as well for that extra crunch in every bite. If you fancy making some pumpkin bread, why not try this one for a change? Have a lovely Fall!


Print Friendly and PDF


Ingredients

2 cups flour
1 teaspoon cinnamon
1/2 teaspoon nutmeg
1 1/2 teaspoon baking powder
1/2 teaspoon baking soda
1/2 teaspoon salt
2 eggs (room temp)
1/2 cup sour cream or plain yogurt (light or regular)
1/3 cup vegetable oil
1 cup firmly packed brown sugar
1/4 cup white sugar
1 teaspoon Vanilla extract
1 cup canned pumpkin puree (not pie filling)
1/3-1/2 cup chopped pecans or walnuts (optional)

For the Praline Topping

1/4 cup firmly packed brown sugar
3 Tablespoons butter, softened
1/2 cup chopped pecans or walnut

Procedure

Preheat the oven to 350F.

Lightly grease a large loaf pan. You can line it with parchment paper for easier removal. Mix all Praline Topping ingredients until crumbly. Set aside.

Combine all the dry ingredients in a bowl. Whisk together to mix. Set aside.


Place all the wet ingredients, including the brown and white sugar, in a mixing bowl. Mix together well. Usually, I lightly beat the eggs first and then add the rest.


Fold in the dry ingredients into the wet one. Make sure that everything is well-incorporated and no flour spots appear. Fold in the nuts (if using).


Pour the  batter into the prepared loaf pan. I suggest using a light colored loaf pan so the bread does not get too dark.

Sprinkle the praline topping onto the batter. Distribute the topping as evenly as you can.


Bake for 50 - 60 minutes or until a toothpick inserted into center of the loaf comes out with only a few crumbs clinging to it.

Cool in the pan for about 15 minutes then remove it by lifting the parchment paper. Transfer to a wire rack and cool completely before slicing. This will ensure the bread will not break apart.

If you like what you see and would like to receive new recipe updates, we'd love you to subscribe to our posts or join our site. Needless to say, we'd love you to like us on Facebook too where you can get more recipes and updates. Thanks and happy browsing!


Share:

Oct 16, 2012

Papaya and Raspberry Smoothie


Here's another lovely smoothie that you can do when you find ripe papayas in the grocery. Try blending it with raspberries and you'll come up with not only a healthy beverage but something that your taste buds will love! Try it!

Ingredients

2 cups ripe papaya, chopped
1-2 cups raspberries
1 cup crushed ice
Sugar or honey, to taste

Procedure

Place all the ingredients in the blender, with the ice at the bottom.
Process till smooth. I use my shake/smoothie button for this.

Note: If you wish to have a creamier version, add some milk (1/4 cup or to taste). When I fancy a Papaya Shake instead of a smoothie then I definitely add milk. :-)

 
 Transfer to a glass and enjoy! 


Share:

Oct 12, 2012

Yummy Baked Oatmeal


I am always on the lookout for new breakfast dishes so it won't always be the same old, same old fare. Besides, though oatmeal is a staple in our household, the taste can get boring. But not anymore, adding cinnamon, nutmeg and cloves to the mix make this baked oatmeal a sure winner and is the current favorite of the two tots!

We first tasted this oatmeal at Good Earth, a cafe in Holland, and we have loved it ever since. I thought I'll try to re-create it and adjust it to our taste. Here it is. Enjoy your breakfast with this very easy and nutritious oatmeal.

Ingredients

2 cups rolled or old-fashioned oats
1/2 cup dark brown sugar
1 teaspoon cinnamon
½ teaspoon nutmeg (optional)
A pinch or two of ground cloves (optional)
1 teaspoon baking powder
1/2 teaspoon salt
1 cup milk
1 egg
1/4 cup or half a stick of butter, melted
1 teaspoon vanilla

.....and, milk for pouring.

Procedure


Preheat the oven to 350F / 180 C. Mix all the ingredients and pour into a greased 9-inch square baking dish. Bake for about 30 minutes.


Take it out of the oven and then let it settle for about 3 mins (only because my family cannot wait longer than this!). Serve warm with milk and dried fruits, if desired. Raisins are particularly perfect for this!


In the summer we enjoy this with fresh berries!

If you wish to print the recipe, there's a print-friendly icon at the end of the post. Click on the "remove images box" for easy printing.


If you like what you see and would like to receive new recipe updates, we'd love you to subscribe to our posts or join our site. Needless to say, we'd love you to like us on Facebook too where you can get more recipes and updates. Thanks and happy browsing!

Share:

Oct 9, 2012

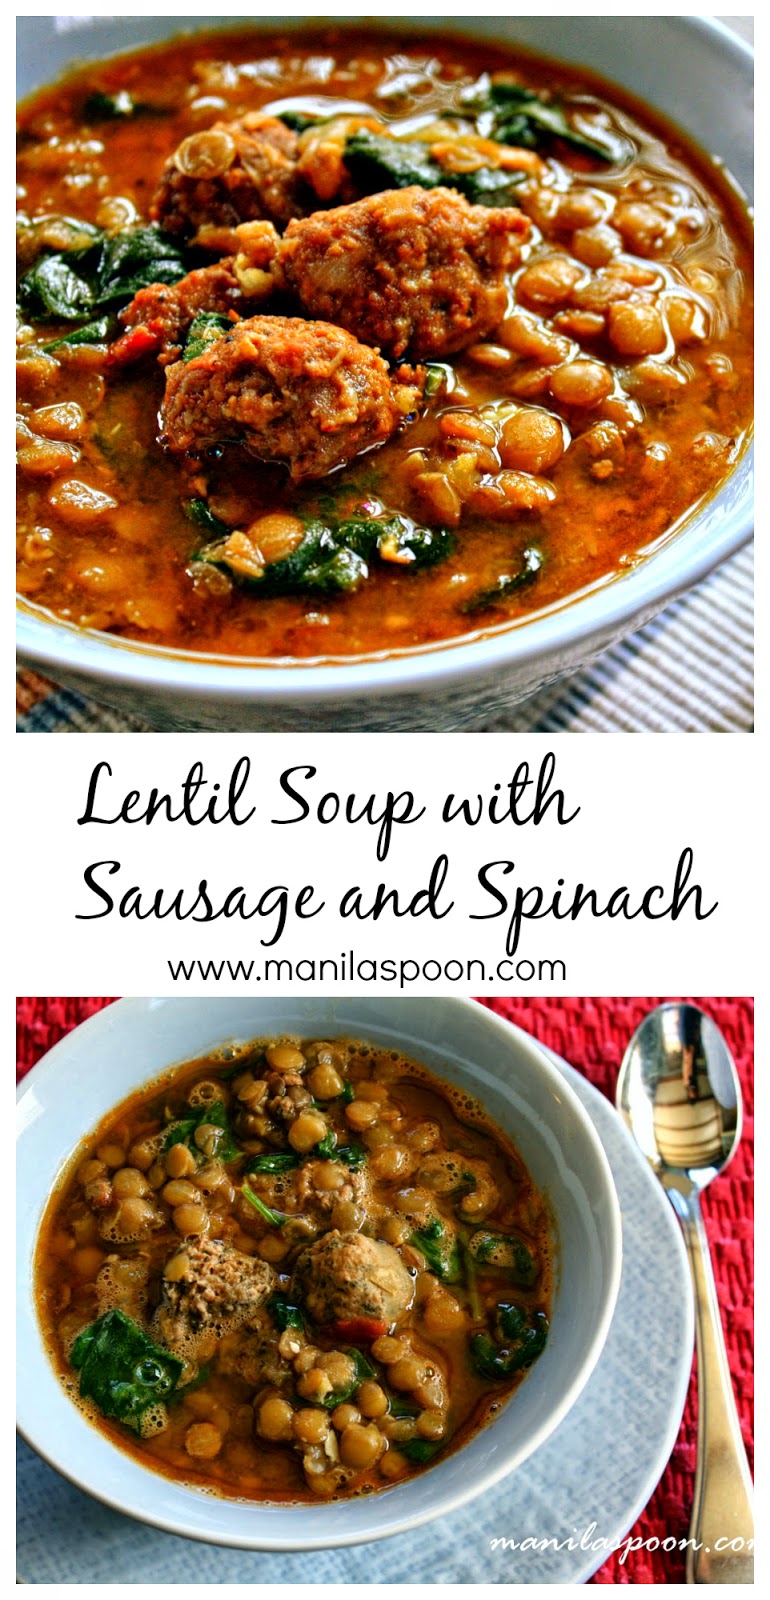
Filipino (Pinoy) Style Lentil Soup


It's getting really cold now and I miss my favorite Mung Bean dish - Ginisang Munggo - which we often have in the Philippines. When I discovered that lentils have a similar taste and texture to my fave mungo I decided to cook it the same way and I love the result. For this recipe, instead of the usual pork and beef cutlets traditionally added in Ginisang Munggo, I opted for Italian sausages for richer taste and texture. Towards the end of cooking, I added some spinach leaves to pack in extra nutrients!

If you're thinking of one healthy meal to cook for your  family that's full of good flavor without much guilt, you have to try this recipe. My husband particularly loves this and little Sophie eats this with rice!

Just leave out the meat if you want a vegan or vegetarian option. Enjoy this healthy soup (or stew) during the cooler days!


Print Friendly and PDF


To delete the photos for printing, click on the image box and tick the "remove" button.


Ingredients

1 Tbsp olive oil
5-6 crushed garlic cloves
2 medium size onions, chopped
1 lb Italian or your favorite sausage (mild or hot or a combo), cut/chopped diagonally
5 diced roma tomatoes 
2 Tbsp light soy sauce
Salt and pepper, to taste
1 ½ cups dried lentils
5 cups of water
1 (10 oz) bag of spinach

Procedure

Heat the olive oil in a deep pan. Sauté the garlic and onions until the onions are tender about 3-4 mins.


Add the sausages and cook until brown. Stir in the tomatoes and soy sauce. Season with salt and pepper then cook for another 3-4 minutes. In the meantime, rinse the lentils and drain. Add the lentils and water to the sausages and vegetables then bring to a boil.


Simmer covered for about an hour or until lentils are tender. Finally, add the spinach and cook just until it's wilted.


Adjust seasoning to your taste. Serve hot on its own or paired with bread or rice.


If you wish to print the recipe, there's a print-friendly icon at the end of the post. Click on the "remove images" box for easy and convenient printing.

If you like what you see and would like to receive new recipe updates we'd love you to join our site, like us on Facebook or follow us on Pinerest. Thanks for stopping by Manila Spoon and happy browsing!


Share:
© Manila Spoon | All rights reserved.
Blogger Template created by pipdig