Top Recipes

Recent Creations

Feb 8, 2013

Molten Chocolate Lava Cake


I have always been a fan of molten chocolate cake but had always been intimidated to even try making one. However, one day I saw these beautiful heart-shaped molds from one of our thrift stores and that gave me the idea that I should at least give it a try. I immediately purchased these pretty little cups 'cause not only were they so cheap, they were also brand new. I thought to myself, these would come in handy someday.

I searched on the web for a recipe for chocolate lava cake and found this very easy recipe from Tasty Kitchen. When I read it, I thought, I can do that. I didn't have a Baking Chocolate but I have always used regular chocolate when baking anyway 'cause I think it tastes much better so I substituted it with what was available in my pantry - a 70% Dark choco bar - pretty intense but that's how we like our choco here - bittersweet. I would say - it's quite a good recipe for the cake turned out very well.  It really worked - the center was soft and when I cut into it - the gooey chocolate center flowed out like a hot lava (it is actually smoother than what the photo shows).  What's more it's so easy to make and you don't even need a mixer to do it.  I have to say though that the edges of the cake are a bit crusty though the center was truly soft. I don't know if it's the baking time that made the edges a little crusty. Original recipe called for 13-14 minutes which I think is a little too long. I have seen other recipes which only call for about 10 minutes or less. I used 12 minutes exactly but I will try doing only 10 minutes next time so it will definitely be gooey in the center and hopefully not too crusty on the edges. But if you're not so fussy --- this is a very good recipe to try! Who cares about the crusty edges when you can put some vanilla ice cream on top of this cake and see it melt with the gooey choco lava! Yum!

Ingredients

4 pieces (squares) Bitter-sweet or Semi-sweet or just plain sweet Chocolate (this is a matter of preference)*
½ cups Butter, chopped into several pieces
1 cup Confectioner's or Powdered Sugar plus an extra 1-2 Tablespoon for dusting, separated
2 whole Eggs plus 2 Egg yolks
6 Tablespoons Flour
 
*Note: You can use Baking chocolate if that is what you prefer for easier measurement, but trust me real chocolate is much better. Do not be scared if you are off by an ounce or so. I don't think it would matter much. This is the chocolate I used because my hubby and I prefer dark and intense chocolate flavor...but your cake won't be so sweet so follow your sweet cravings. I used about 4 pieces (they are individually wrapped). You can find this at Aldi's and they are cheaper than Ghirardelli's but oh so good too!
 

Procedure

Preheat oven to 425 degrees. Grease/spray about 4 custard molds/cups or small ramekins with a non-stick spray and then place them on a baking tray (cookie sheet).

The next step requires melting the butter and chocolate. You can use the microwave to do so but I don't have one so I use the double boiler method to melt my choco and butter. If doing the double boiler method, place the butter and chocolate in a stainless steel bowl above a saucepan with barely simmering water. Make sure the bowl does not touch the water. Let the choco and butter melt.


Stir as the choco and butter melts and has become smooth in texture. A spatula is handy with this.


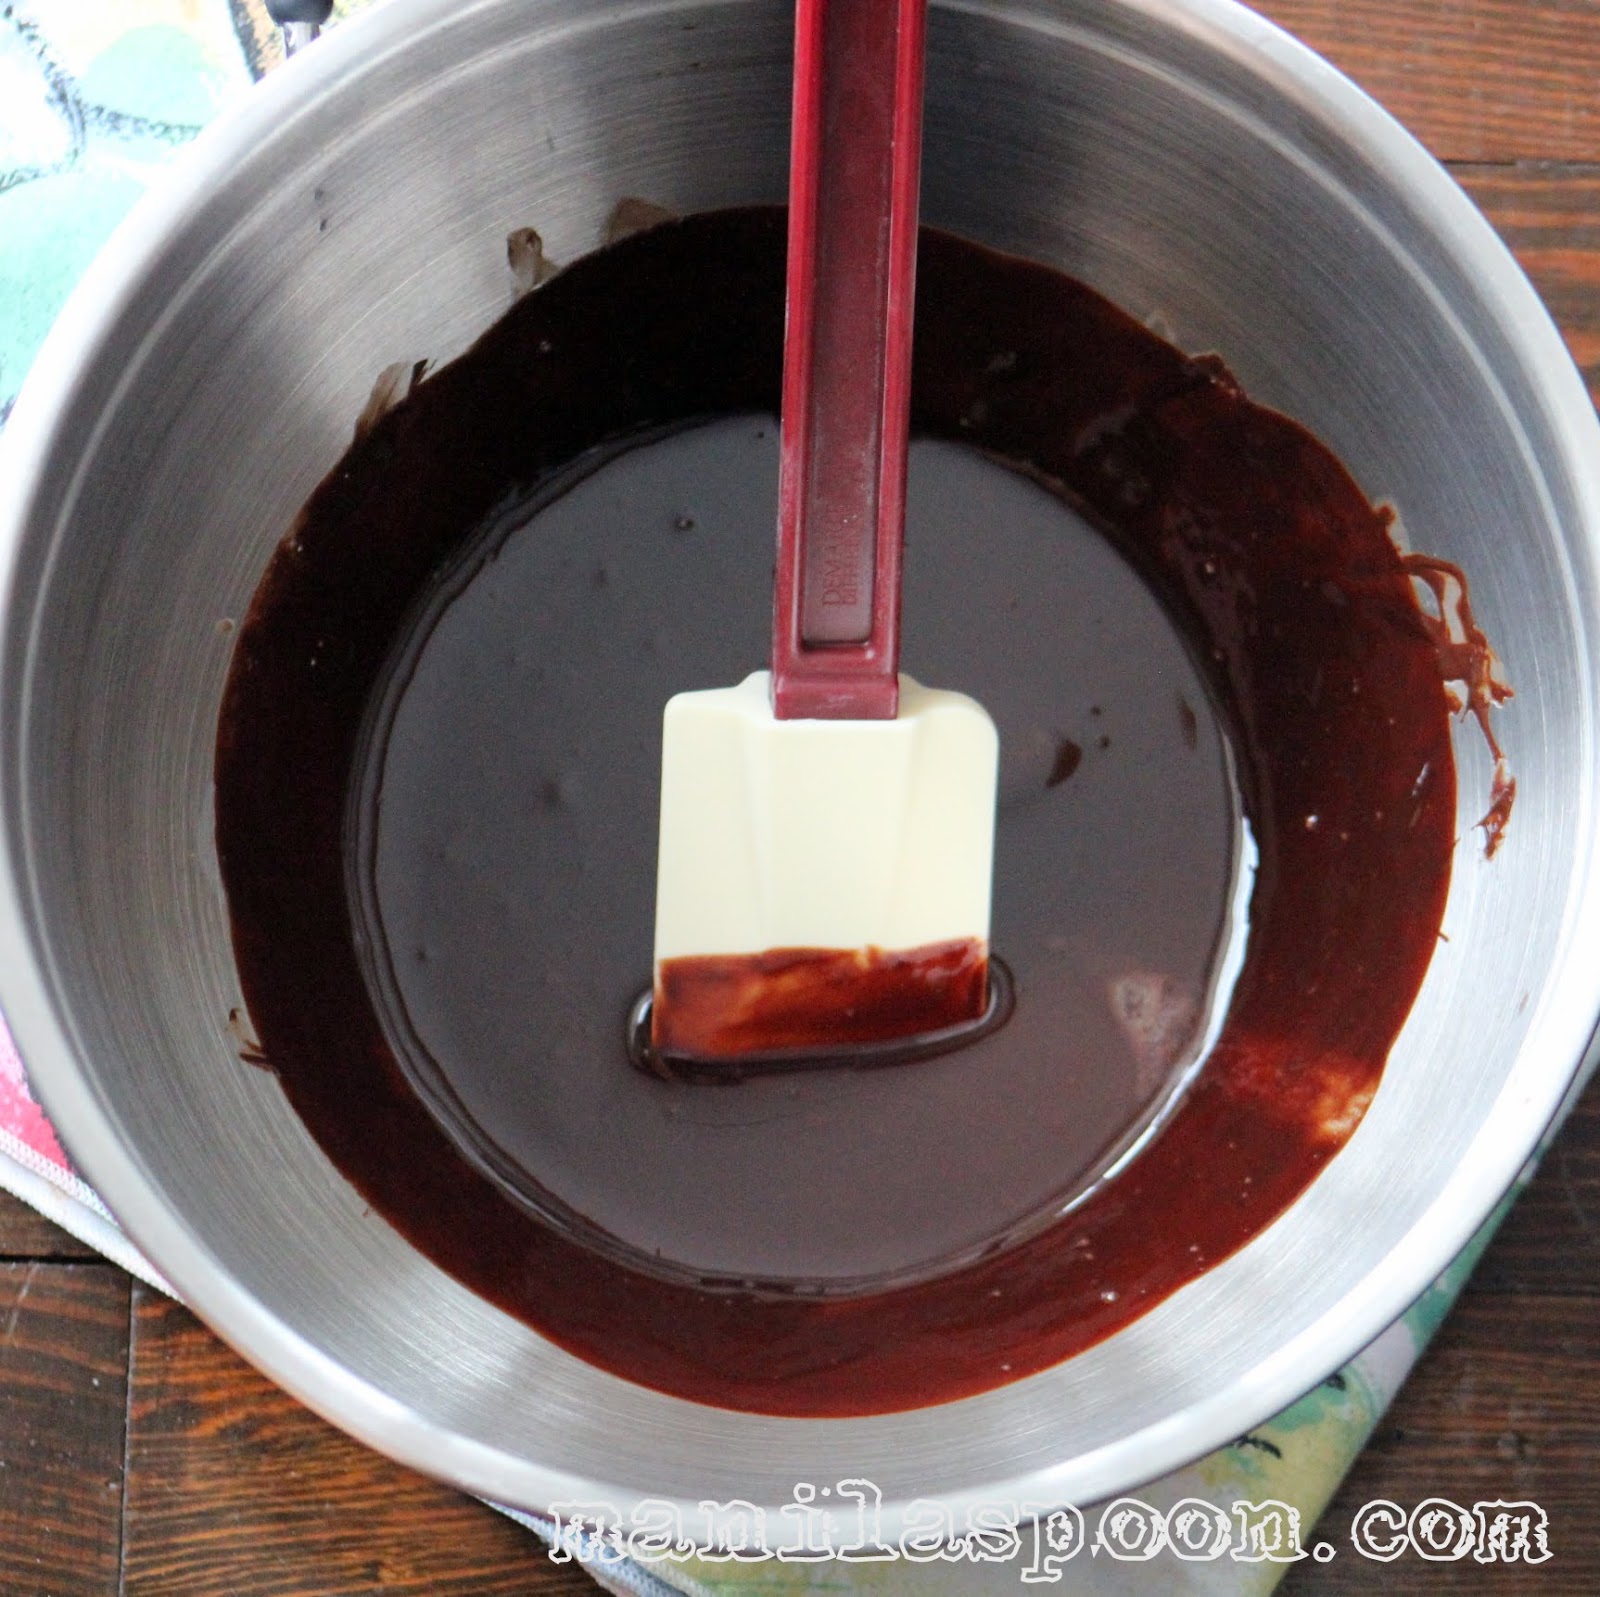
Add 1 cup powdered or confectioner's sugar then whisk together until smooth.


Add the 2 eggs and the 2 egg yolks then whisk together again until smooth.


Stir in the flour just until combined.


Divide the chocolate batter evenly among the 4 custard molds. Since it's Valentine's Day I used heart-shaped molds. 
 
 
Bake in the preheated oven for about 11-12 minutes, or until the sides are firm but still soft in the center. See photo below.


Let cool for about 2 minutes (set the timer so you won't forget!). Thereafter, invert the cakes onto serving plates. They should release very quickly. Dust with the remaining powdered sugar. Serve with some fruits on the side, if desired.
 

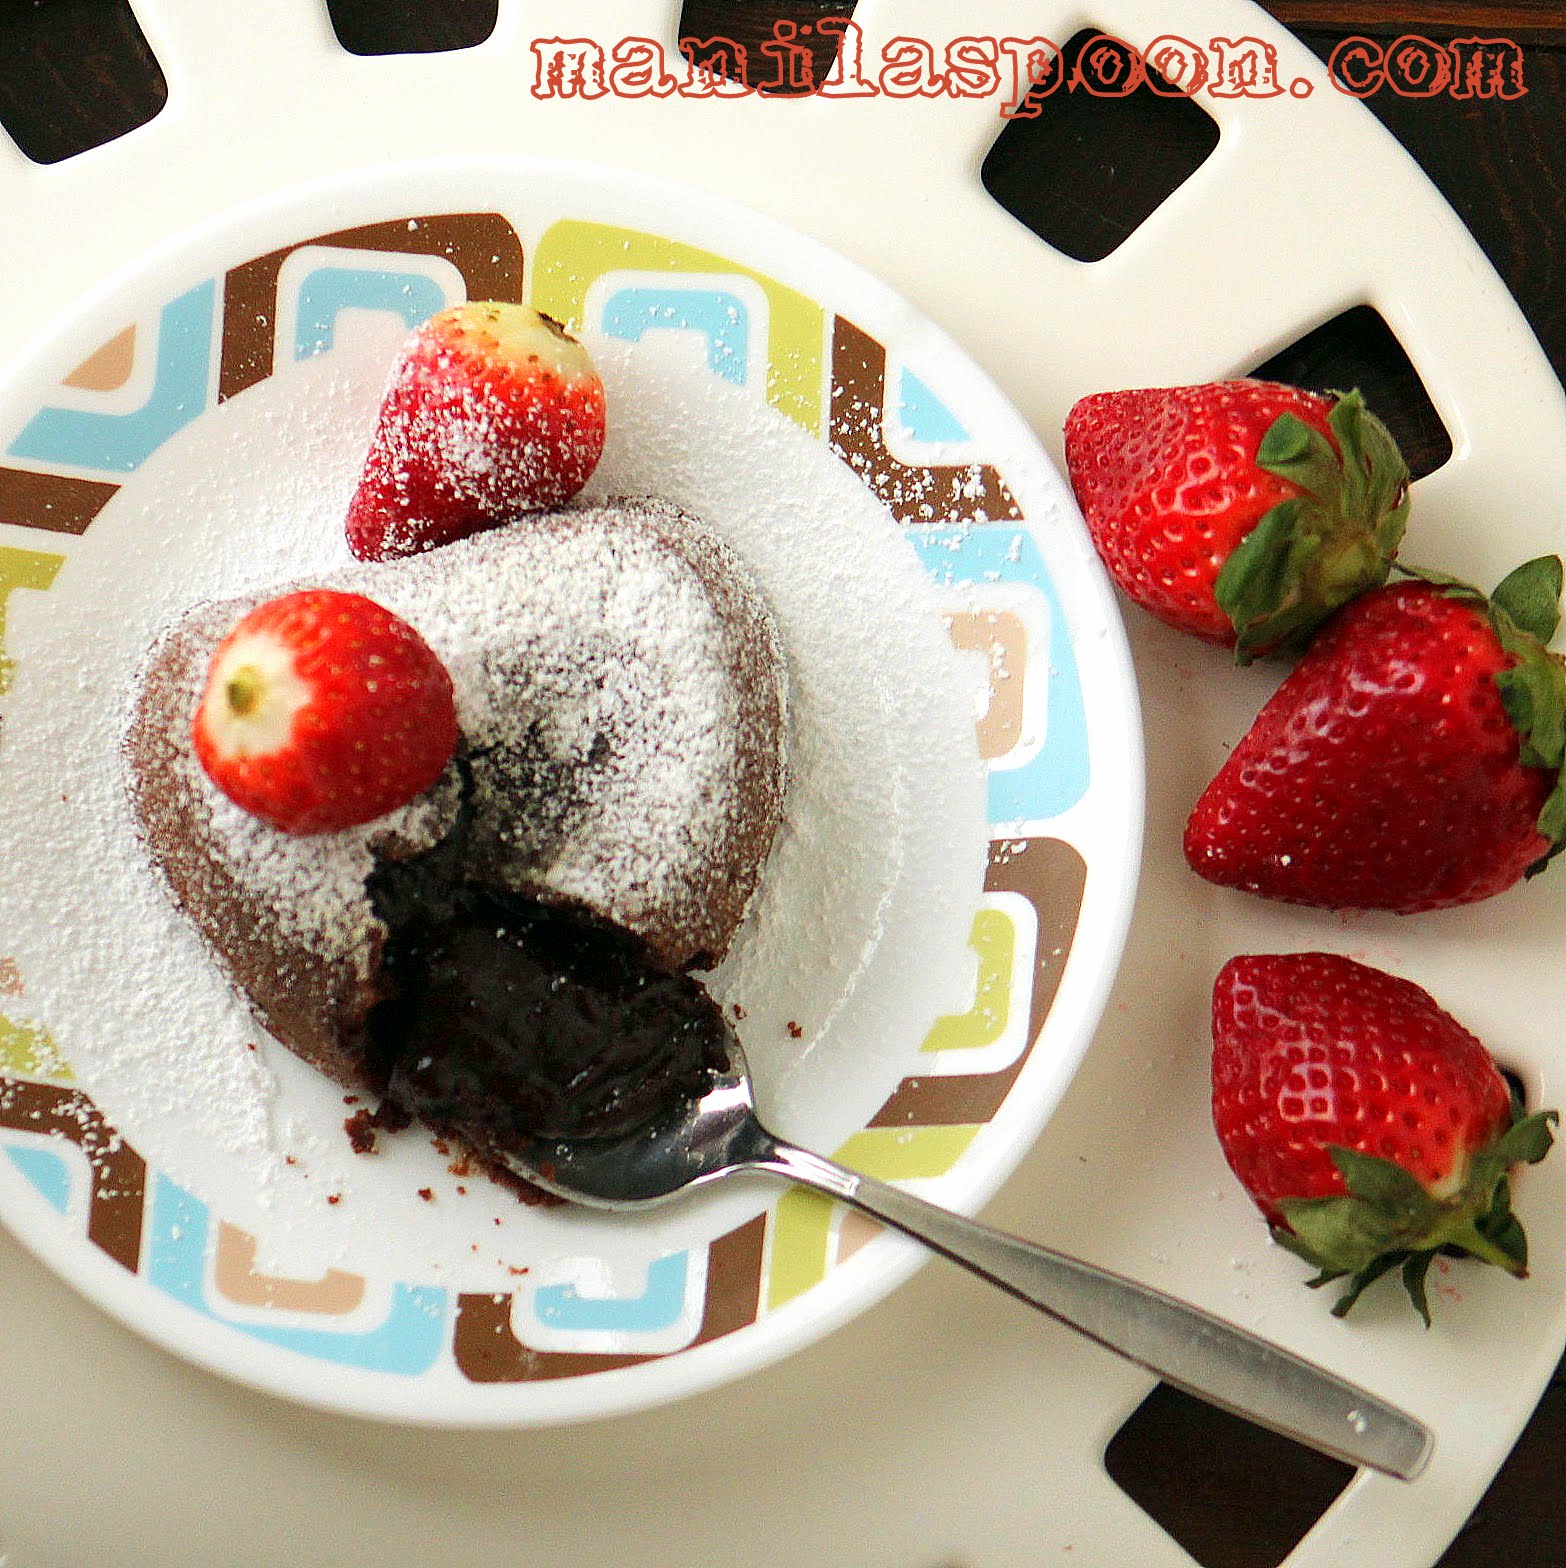
Serve immediately! Enjoy all that gooey chocolate goodness! And, yes this is so perfect with vanilla ice cream, too or even plain whipped cream!
 

If you like what you see and would like to receive new recipe updates we'd love you to subscribe to our posts and join our site. Also do like us in Facebook so you can get the latest updates and so much more. Thanks for visiting and happy browsing!

This recipe is featured at Ladies' Night Linky Party.
Share:

Feb 5, 2013

4-Ingredient Nutella Cookies


Before I have ever made my 3-Ingredient Peanut Butter Cookies, I never much believed that it was possible to make cookies with such a few ingredients. How could it be? But then I was proven wrong and yes, it was indeed possible to make the loveliest cookies with only a few ingredients. In fact, because there are only very few ingredients - the flavor is more concentrated (pure chocolate bliss in these Nutella Cookies) not to mention - it becomes so simple to make too!

I have been wanting to try making these Nutella cookies for the longest time but for some reason never got the chance to do so. But since today is World Nutella Day (who knew there is such a day?) I thought I ought to give it a try....after all I have some Nutella sitting on my counter top and waiting to be enjoyed.

The verdict - these Nutella Cookies are heavenly!!! Not only are they easy to make, they are so yummy too and amazingly not overpoweringly sweet! Moist, chewy and fudgy - pure chocolate deliciousness at it best! You really ought to try this!

I will give credit where credit is due....for this recipe I am totally indebted to Kirbie's Craving. I have adapted her Easiest Nutella Cookies for this recipe. And I would say --- it is a total winner!


Ingredients

1 cup Nutella
1 egg
1/2 cup + 2 Tablespoons flour
1/2 cup Semi-sweet Chocolate Chips


Procedure

Preheat the oven to 350F.

In a large mixing bowl, combine the nutella, flour and egg.


Using a wooden spoon, mix until the dough comes together and no flour lumps remain. 


Stir in chocolate chips until they are all incorporated into the dough.


For the next step, I used a rounded tablespoon to help shape the cookies into dough balls. It's actually a rounded measuring tablespoon for a tea pot so it's slightly larger than your usual measuring spoon but the latter should work well too. I managed to make about 18 dough balls.

Place the cookie balls on a cookie sheet about 2 inches apart. I pressed the cookie balls slightly to flatten them a little bit. I think I will just leave them rounded next time. If you want perfectly rounded edges on your cookies, then smooth out the cracks on the cookies. I wasn't bothered so I just left it as is, cracks and all!


Bake for about 10 minutes. Cookies would still be slightly soft but that's fine. Leave in the cookie sheet for about 3-4 minutes or until it has hardened just a little bit to make it easier to transfer to a wire rack. Let the cookies cool on a wire rack until completely set.


Enjoy the cookies while still warm-ish and the choco chips are still soft and quite meltingly tender.  Or serve it after it has totally cooled too - the cookies still retain their yummy chewiness! Chocolate perfection defined!

If you wish to print the recipe, there's a print icon below the post. Click on the "remove images" box for easy and convenient printing.


If you like what you see and would like to receive new recipe updates we'd love you to subscribe to our posts and join our site. Also do like us in Facebook so you can get the latest updates and so much more. Thanks for visiting and happy browsing!


Share:

Feb 4, 2013

Sweet-Tart Apple Walnut Salad


In winter, it can be difficult to eat well. The cold weather almost makes you want to reach out to whatever is nearby and that may not be necessarily a healthy snack but since it's sitting on the counter top or looking at you when you open the fridge, it's so easy to grab them and let go! But since the cold weather brings a lot of sickness and bugs and viruses, it's important to keep yourself healthy and assist your body in fighting infections. While there is no cure-all for the common cold you can certainly help your immune system by eating right. And greens are always good for you!

Thankfully, we can still find salad greens around the supermarket and some of them are organic and pre-packed. I actually found this recipe at the back of the package of one of those pre-packed salads. I thought it sounded great so I adapted it. It was wonderful! Now who can say, salads can't be delish? Add some lovely fruits, a little nuts and sprinkle with cheese - voila and you have a salad that's easy to prepare and scrumptious too! Serve it with your favorite dressing though my honey and I love a simple Balsamic Vinaigrette with it (he makes his own version though we always have a bottle handy for days when you don't have time to whip up one!). Have a great lunch!


Ingredients

1 pack or bag (5-6 oz) of Three-lettuce salad blend (baby red leaf, baby green or red romaine or little gem lettuce combos, etc) or make your own combo
2 medium Gala apples, cored and sliced
3/4 cup or 3 oz, chopped Walnuts
1/3 cup craisins or raisins
1/4 cup Balsamic Vinaigrette (homemade* or store-bought)
1/2-3/4 cup crumbled Feta Cheese

This is how my husband makes his simple Balsamic Vinaigrette - Mix together 2 Tablespoons each of Extra Virgin Olive Oil and Balsamic Vinegar. He doesn't sweeten it at all but if you wish add - 1/2-1 Tablespoon (or to taste) of honey or maple or even agave nectar as sweetener. Season with a little salt and pepper to taste. Enjoy!

Procedure

In a large salad bowl combine the lettuces, apples, walnuts and craisins/raisins. Gently toss together to mix well. Sprinkle the Feta cheese on top. Drizzle with the Balsamic Vinagrette and mix gently. Serve immediately.

 
Next time I will try crumbled Bleu Cheese with it and also add some green or red grapes! Oh yum!


If you like what you see and would like to receive new recipe updates we'd love you to subscribe to our posts and join our site. Also do like us in Facebook so you can get the latest updates and so much more. Thanks for visiting and happy browsing!
Share:

Feb 2, 2013

Zucchini Soup

Easy to make, tasty and healthy soup for the remaining days of winter and to welcome Spring - ZUCCHINI SOUP. Gluten-free and low-carb, too! | manilaspoon.com

Winter means soup and I have been trying my hand on a few vegetable soups so we can enjoy a healthier version everytime we want some. After trying out and loving our Brocolli Soup it was time to try a Zucchini version. However, I wanted to add a little extra flavor to the soup and I thought I'd try to add some fennel seeds. I know they have a nice anise flavor and perhaps that will work with Zucchini. I wasn't sure though if it will even manifest itself but when I pureed the whole batch, I tasted just a hint of it and I was pleased with it. It does not overpower the other ingredients but gives it that extra flavor dimension which for me is enjoyable. But if you cannot find fennel seeds or they are not handy, then don't worry I am pretty sure it will still be a good tasting soup. It just so happened I have some left in the pantry so I decided to try it.

If you use 6 cups of broth, it will be more of a runny and thin soup but if you wish a creamier and thicker version, then feel free to lessen the cups to about 4. Either way, I think it's lovely and delicious and wonderful with grilled ciabatta and melted provolone which is what we had with this soup. Unfortunately, the bread got eaten before I could take the photo. Anyway, enjoy another lovely and healthy soup to last you during the last few months of winter.

Easy to make, tasty and healthy soup for the remaining days of winter and to welcome Spring - ZUCCHINI SOUP. Gluten-free and low-carb, too! | manilaspoon.com


Ingredients

2 Tablespoons Olive oil
1 Tablespoon Butter
3 garlic cloves, choped
1 medium onion, chopped
1/2 teaspoon fennel seeds
4 Zucchini (medium to large), thickly sliced
1/2 Tablespoon Fresh Thyme
6 cups chicken or vegetable stock (4 cups only if you wish a thicker or creamier soup)
Salt and pepper, to taste (optional)
Cream and Chives (for garnish)

Easy to make, tasty and healthy soup for the remaining days of winter and to welcome Spring - ZUCCHINI SOUP. Gluten-free and low-carb, too! | manilaspoon.com

Procedure

Melt the butter with the olive oil in a large saucepan. Saute the onion, garlic and fennel seeds in gentle heat for about 5-8 minutes or until the onions has softened and has changed its color. Add the sliced zucchini and toss gently for about 5 minutes. Add the fresh thyme and the stock. Bring to a boil then simmer just until zucchini is tender roughly 5-8 minutes. Add salt and pepper, to taste, if it needs seasoning or if you use low-sodium chicken or vegetable stock.

Set aside the soup to cool down a little before you puree it.

In a blender or large food processor, puree the zucchini mixture to your desired  thickness and consistency. Serve in bowls with a dollop of cream and some snipped chives. Enjoy!


 If you like what you see and would like to receive new recipe updates we'd love you to subscribe to our posts and join our site. Also do like us in Facebook so you can get the latest updates and so much more. Thanks for visiting and happy browsing!


Easy to make, tasty and healthy soup for the remaining days of winter and to welcome Spring - ZUCCHINI SOUP. Gluten-free and low-carb, too! | manilaspoon.com

Share:

Feb 1, 2013

Fluffy Pancakes with Blueberries and Walnuts


I go nuts over nuts! I just love them on everything! They add texture, crunch and a lot more flavor for sure! I have never tried them on pancakes though so one day I thought I'd give it a try. I still had some blueberries so I thought, why not combine them with the pancake batter. The blueberries will add some soft texture and sweetness while the walnuts will provide the crunch and extra flavor! Oh wow, a match made in heaven. The addition of nuts and berries really made these fluffy lovely pancakes so extra special!
 
Enjoy this nutty, fruity and oh so yummy Fluffy Pancakes with Blueberries and Walnuts! Have a great day!


Ingredients

1 1/2 cups all-purpose flour
2 Tablespoons sugar
3 1/2 teaspoons baking powder
1/4 teaspoon salt
1 1/2 cups milk (less if you want thicker pancakes)
1 egg
3 Tablespoons unsalted butter, melted
1 cup Blueberries
1/2 cup chopped walnuts 

Procedure

Sift together the flour, baking powder, salt and sugar in a large mixing bowl. Make a well in the center, place the egg in, then pour in the milk and the melted butter. With a whisk, mix until the batter is free from big lumps or until relatively smooth. Fold in the nuts and berries and gently mix them in.


Heat a griddle or frying pan (some pans need to be greased a bit beforehand) over medium high heat. (I use a non-stick griddle so there’s no need to grease it all). When the pan or griddle is hot enough, scoop the batter onto the griddle/pan using a small measuring cup (1/4-1/3 cup size). Cook until bubbly approximately – 1 to 2 minutes.


Flip and brown the other side. Just cook until it's fully set, approximately 1-2 minutes.

Spread some butter on the pancakes and serve with warm maple syrup or your preferred sweetener.

 
If you like what you see and would like to receive new recipe updates we'd love you to subscribe to our posts and join our site. Also do like us in Facebook so you can get the latest updates and so much more. Thanks for visiting and happy browsing! 
Share:
© Manila Spoon | All rights reserved.
Blogger Template created by pipdig