


Sep 3, 2013
Raspberry Chocolate Chip Muffins
Jul 20, 2013
NO BAKE White Chocolate Raspberry Cheesecake with fresh Raspberry Coulis
This luscious NO BAKE White Chocolate Raspberry Cheesecake is the ultimate summer dessert. Fresh and sweet-tangy raspberry coulis perfectly complements the rich and creamy cheesecake.Tried and tested, super easy recipe, too!

As some of you dear readers would know I am married to a British guy, my lovable and cute husband Mark...obviously I am very much in-love with him! :-) Anyway, he loves Cheesecake and I do too - I guess, most people do.... :-)
May 11, 2013
2-Ingredient Chocolate Mousse

It's Mother's Day tomorrow and all the Moms need a little indulgence and pampering on this day so I timed this delicious post just for Mother's Day. I haven't heard of any Mom who doesn't like chocolate. So why not make this elegant, easy and truly delectable - 2-Ingredient Chocolate Mousse and make Mom happy! :-) Enjoy!

Note: This recipe uses raw eggs, so beware that raw eggs may not be safe for the very young, pregnant women, the elderly, the ill, and those with immune-system disorders. For more details on egg safety, check out this link.
Ingredients
8 oz (2x {4 oz}) of your favorite Chocolate Bar, chopped or broken into pieces (we like 70% Dark)
4 large Eggs (yolk and white separated)
1-2 Tablespoons extra-fine White Sugar (optional)*

*If you are using a sweet Chocolate Bar there is no need for any sugar but if you are using Dark Chocolate and you want it a little sweeter then add a tablespoon or 2 of sugar.
Procedure
In a heatproof bowl and over barely simmering water, melt the chopped/broken chocolate. Make sure that the bowl does not touch the water. Remove the bowl from the heat. I always use this method but you can also use the microwave to melt the chocolate.
While you are melting the chocolate you can also begin the process of making the meringue/egg whites. Using an electric mixer, beat the egg whites until soft peaks form. Sprinkle the sugar, if using, over the egg whites and continue to beat until the sugar is fully dissolved and the mixture looks glossy. Do not over beat.
Here's a quick video link on how to beat egg whites to soft peaks for reference.
In another bowl, beat the egg yolks and then slowly stir into the hot chocolate.
Fold the meringue gently into the chocolate mixture using a rubber spatula. Do this slowly until everything is mixed thoroughly. Divide the mixture into several glasses or small bowls and chill over night. I recommend overnight chilling because the chocolate tends to sweeten if left for that amount of time and tastes oh so heavenly afterwards! :-)
Chilling will harden the chocolate so allow the Chocolate Mousse to soften by letting it sit at room temperature for about 15 minutes. Enjoy!!!

Apr 25, 2013
Fresh Strawberry and White Chocolate Muffins

Imagine a cold and gloomy morning and you wake up to the delicious aroma of freshly baked muffins that's still warm and waiting just for you! What an ideal way to start the day, right? It's not impossible and I sure have an excellent recipe for you - Fresh Strawberry and White Chocolate Muffins!
Feb 16, 2013
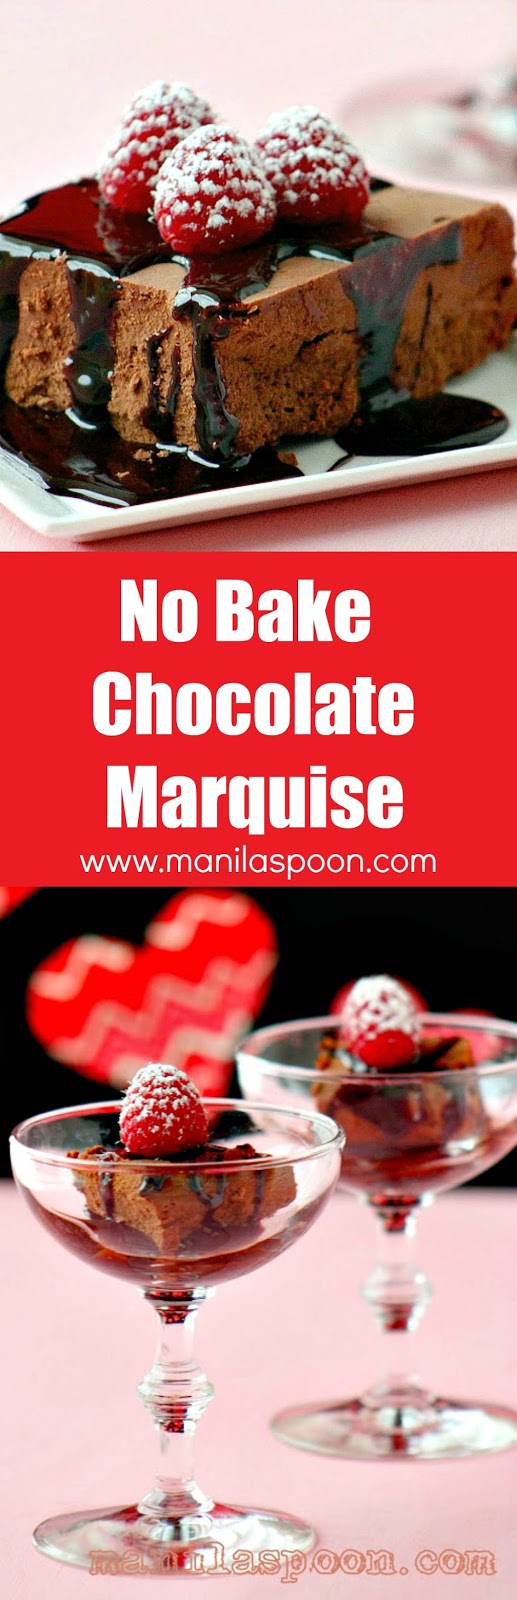
No Bake Chocolate Marquise
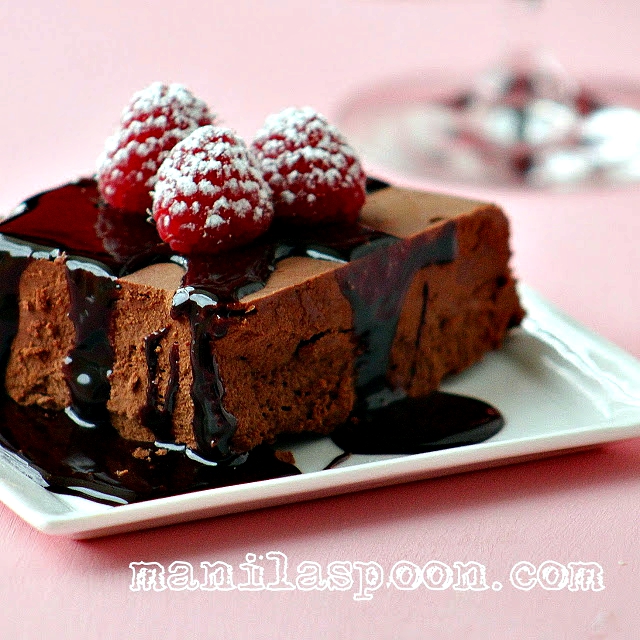
Though chocolate marquise is fairly simple in its ingredients, it can be turned into a very elegant dessert as it can be molded into various shapes (depending on what pan you use) and served with fresh fruits and for me the best pairing would be some sugar-dusted sweet-tart raspberries!
This recipe came from my mother-in-law and she often makes this when we visit England and because fares for a family of 4 are always sky-high we don't get to see them that often. I think my hubby misses this great dessert so much that For Valentine's Day he requested me to make this for him. I was naturally scared because I know that his mom makes the best Choco Marquise and I don't know if I can duplicate it but since it's a special day I thought I ought to at least give it a try. It was amazing!!! Even though my mixer did not cooperate well (it broke down) so I wasn't able to totally reach the stiff peak for the egg whites, the chocolate still came out great. If you don't want a very strong coffee taste - use mild coffee granules - I used the Starbucks ready brew and that was intense. However, I discovered that after the cake has rested for 1 day - the coffee taste actually mellowed and the taste was even better - that is if you can wait for another day! Also, make sure that you use the best chocolate you can buy - a serious chocolate dessert like this demands a seriously excellent chocolate too!

This recipe can easily be doubled too if you want to make it for guests but since we are not a huge family I only made half a batch. If you are doing this for company do a double batch (just double the ingredients) so that when you place it in the loaf pan, it's much taller in height and not flat. Below is what it looks like when you just do a half-batch, like I did. It will look more like a big chocolate slab rather than a chocolate loaf. I think I used a big loaf pan too that's why it wasn't very tall. The good thing about this is that you can cut them into small squares and serve them in individual cups. As I mentioned this is an intense chocolate dessert so you don't need a huge piece to serve it, unless that's what you want. It's quite more-ish though so be aware that you've been warned! :-)
You can serve this dessert in small individual squares as shown below. Enjoy!

Ingredients
American and Metric
225 gm (8 oz) Bittersweet Chocolate
100 gm (4 oz) Unsalted Butter (softened or room temp)
175 gm (6 oz - 3/4 cup) Icing or confectioner's Sugar
3 Eggs (separate the yolks from the whites)
1/2 teaspoon instant coffee granules dissolved in 1 teaspoon of water
For the Chocolate sauce
100 gm (4 oz / 1/2 cup) caster or super-fine baking sugar
50 gm (2oz / 1/4 cup) Cocoa Powder
Procedure
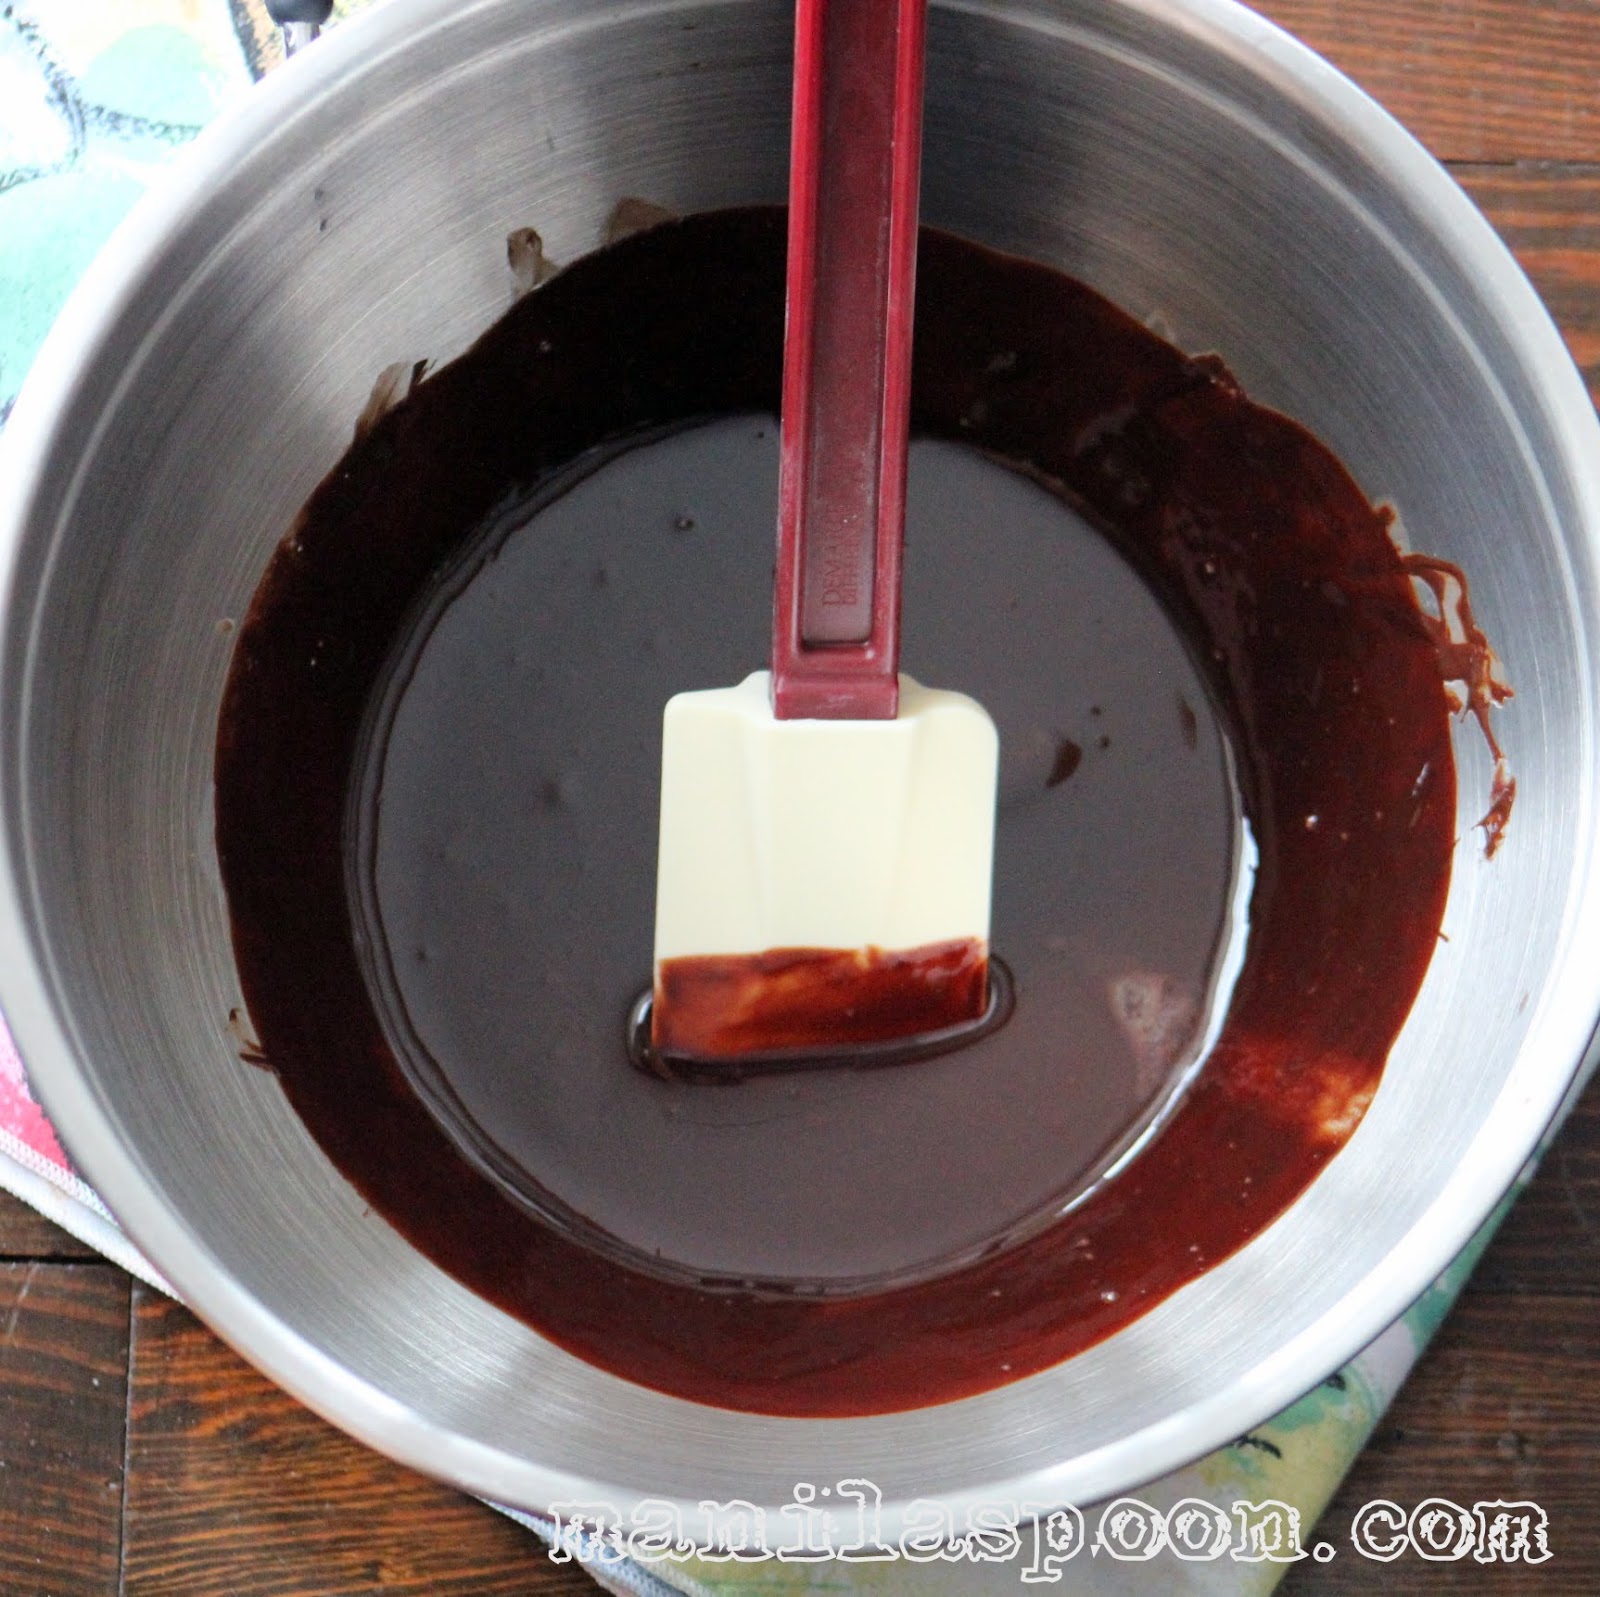
Line an (8 x 4 x 2 in) loaf tin with clear film (saran wrap), allowing it to overlap the sides and ends. Break the chocolate into a small heat-proof bowl and place over a saucepan of simmering water (not boiling) until melted. Make sure the bowl does not touch the water. Stir until smooth. Remove the bowl from the pan and allow to cool slightly.
Procedure
Line an (8 x 4 x 2 in) loaf tin with clear film (saran wrap), allowing it to overlap the sides and ends. Break the chocolate into a small heat-proof bowl and place over a saucepan of simmering water (not boiling) until melted. Make sure the bowl does not touch the water. Stir until smooth. Remove the bowl from the pan and allow to cool slightly.
In a mixing bowl, cream the butter and the confectioner's sugar until soft and smooth. Separate the eggs, beating the yolks into the creamed butter one at a time. Beat in the dissolved coffee granules, add the chocolate and mix well. Beat the egg whites until stiff. Fold one third of the beaten whites into the chocolate mixture to lighten it, then gently fold in the remainder.
Spoon the mixture into the prepared loaf tin and spread evenly. Chill until firm for at least 4 hours.
Meanwhile, measure 1/4 pint water (about half a cup) and the caster sugar for the chocolate sauce. Stir over a low heat until the sugar has dissolved and the syrup is boiling. Add the cocoa powder and whisk until smooth. Cool and refrigerate. (I used only about 1/4 cup water and the chocolate sauce was thick).
Meanwhile, measure 1/4 pint water (about half a cup) and the caster sugar for the chocolate sauce. Stir over a low heat until the sugar has dissolved and the syrup is boiling. Add the cocoa powder and whisk until smooth. Cool and refrigerate. (I used only about 1/4 cup water and the chocolate sauce was thick).
Lift the Chocolate Marquise and invert onto a plate. Let it sit for 10-15 minutes in room temp after you've taken it out of the fridge to soften it a little (so it won't crumble when you cut it). For easier cutting, use a non-serrated knife that's been dipped in warm water. Drizzle with the chocolate sauce and top with some sugar-dusted raspberries. Glazed apricots, fresh strawberries can also be served with this sweet and chocolatey dessert for sharpness of flavour and colour contrast.

If you like what you see and would like to
receive new recipe updates we'd love you to subscribe to our posts and join our
site. Also do like us in Facebook so you can get the latest updates and so much
more. Thanks for visiting and happy browsing!
This recipe is featured at Slow Roasted Italian Ladies' Night - Linky Party.
Feb 8, 2013
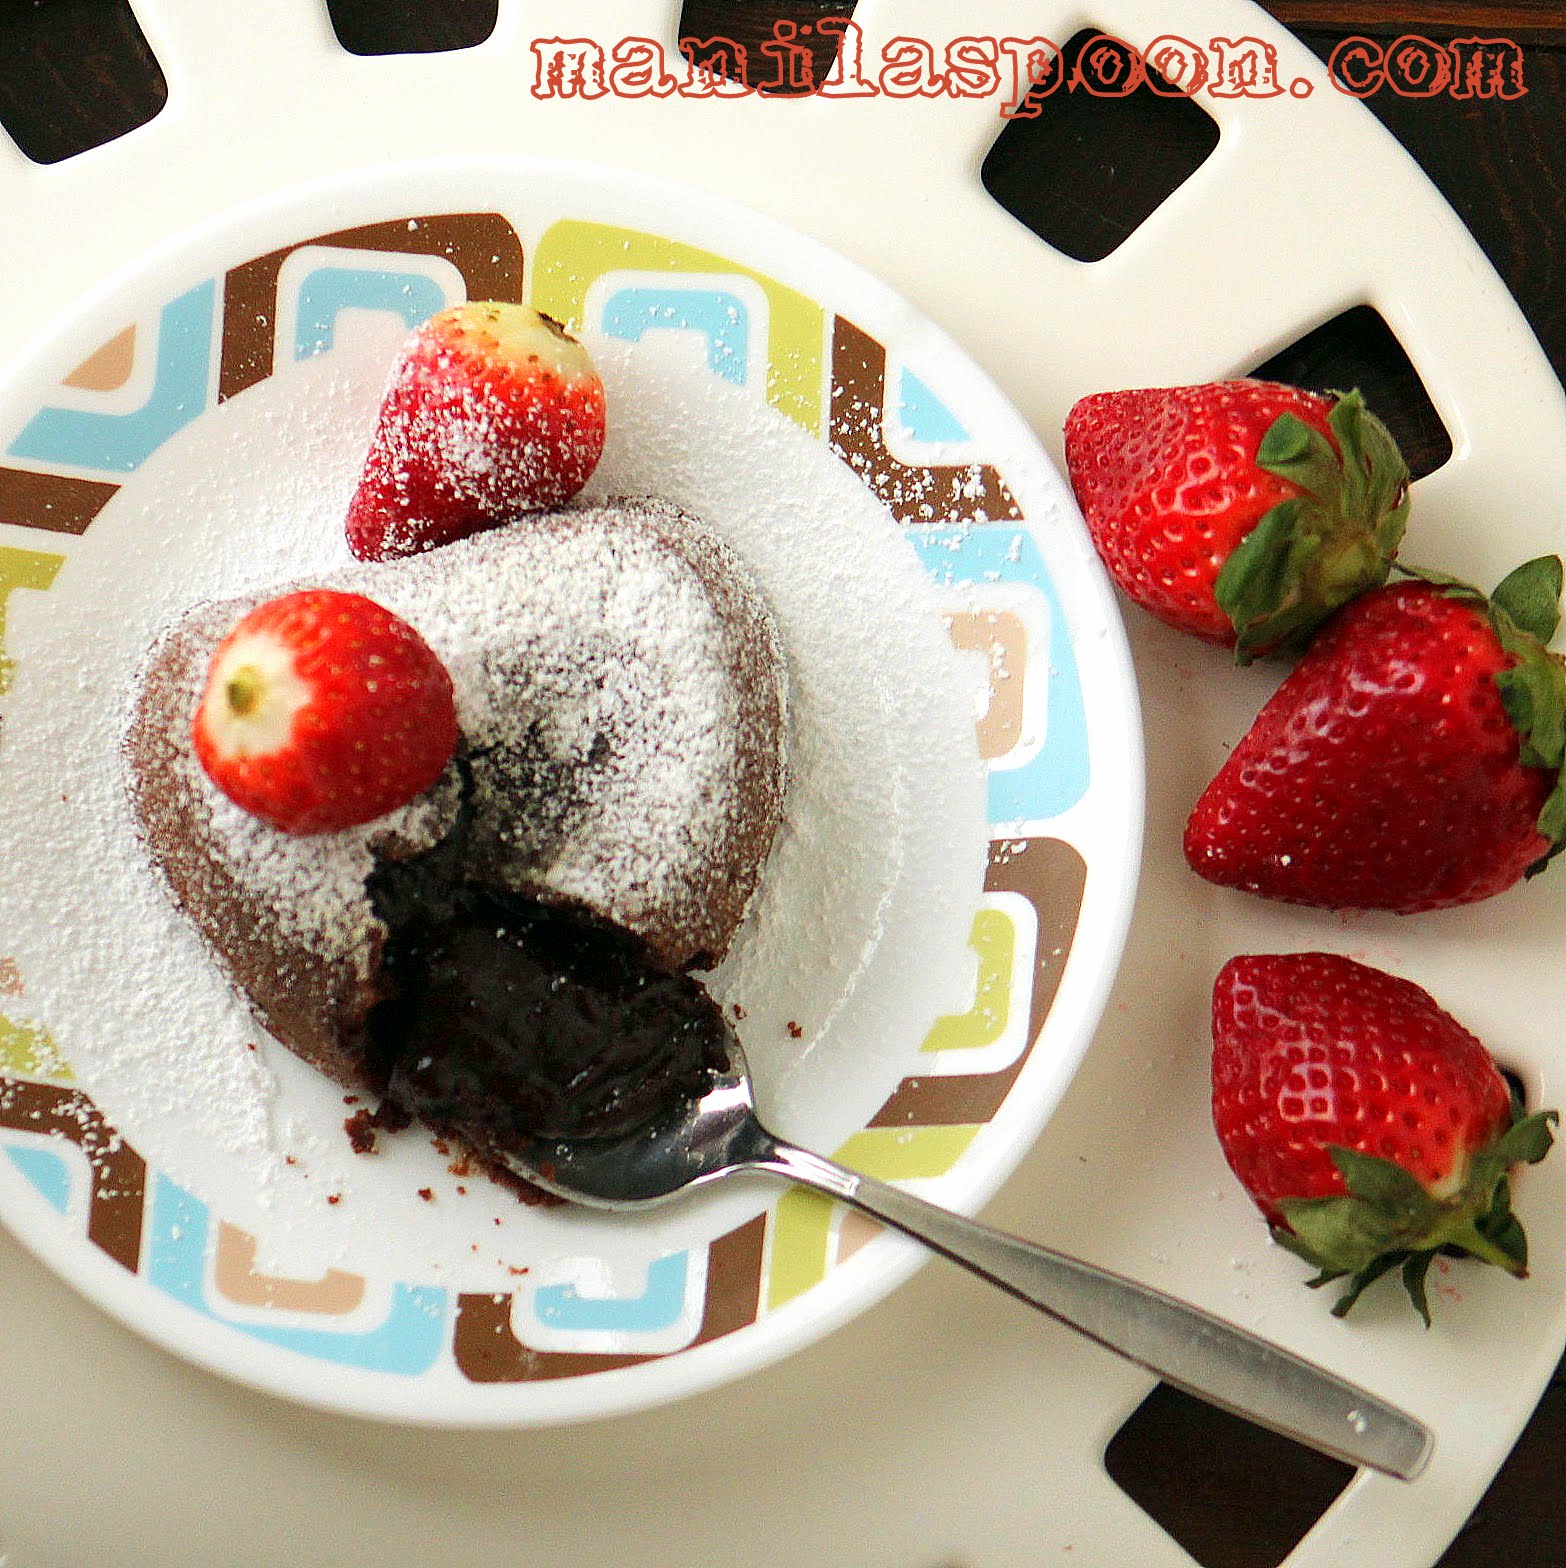
Molten Chocolate Lava Cake

I have always been a fan of molten chocolate cake but had always been intimidated to even try making one. However, one day I saw these beautiful heart-shaped molds from one of our thrift stores and that gave me the idea that I should at least give it a try. I immediately purchased these pretty little cups 'cause not only were they so cheap, they were also brand new. I thought to myself, these would come in handy someday.
I searched on the web for a recipe for chocolate lava cake and found this very easy recipe from Tasty Kitchen. When I read it, I thought, I can do that. I didn't have a Baking Chocolate but I have always used regular chocolate when baking anyway 'cause I think it tastes much better so I substituted it with what was available in my pantry - a 70% Dark choco bar - pretty intense but that's how we like our choco here - bittersweet. I would say - it's quite a good recipe for the cake turned out very well. It really worked - the center was soft and when I cut into it - the gooey chocolate center flowed out like a hot lava (it is actually smoother than what the photo shows). What's more it's so easy to make and you don't even need a mixer to do it. I have to say though that the edges of the cake are a bit crusty though the center was truly soft. I don't know if it's the baking time that made the edges a little crusty. Original recipe called for 13-14 minutes which I think is a little too long. I have seen other recipes which only call for about 10 minutes or less. I used 12 minutes exactly but I will try doing only 10 minutes next time so it will definitely be gooey in the center and hopefully not too crusty on the edges. But if you're not so fussy --- this is a very good recipe to try! Who cares about the crusty edges when you can put some vanilla ice cream on top of this cake and see it melt with the gooey choco lava! Yum!
Ingredients
4 pieces (squares) Bitter-sweet or Semi-sweet or just plain sweet Chocolate (this is a matter of preference)*
½ cups Butter, chopped into several pieces
1 cup Confectioner's or Powdered Sugar plus an extra 1-2 Tablespoon for dusting, separated
2 whole Eggs plus 2 Egg yolks
6 Tablespoons Flour
*Note: You can use Baking chocolate if that is what you prefer for easier measurement, but trust me real chocolate is much better. Do not be scared if you are off by an ounce or so. I don't think it would matter much. This is the chocolate I used because my hubby and I prefer dark and intense chocolate flavor...but your cake won't be so sweet so follow your sweet cravings. I used about 4 pieces (they are individually wrapped). You can find this at Aldi's and they are cheaper than Ghirardelli's but oh so good too!

Procedure
Preheat oven to 425 degrees. Grease/spray about 4 custard molds/cups or small ramekins with a non-stick spray and then place them on a baking tray (cookie sheet).
The next step requires melting the butter and chocolate. You can use the microwave to do so but I don't have one so I use the double boiler method to melt my choco and butter. If doing the double boiler method, place the butter and chocolate in a stainless steel bowl above a saucepan with barely simmering water. Make sure the bowl does not touch the water. Let the choco and butter melt.

Stir as the choco and butter melts and has become smooth in texture. A spatula is handy with this.
Add 1 cup powdered or confectioner's sugar then whisk together until smooth.

Add the 2 eggs and the 2 egg yolks then whisk together again until smooth.

Stir in the flour just until combined.


Divide the chocolate batter evenly among the 4 custard molds. Since it's Valentine's Day I used heart-shaped molds.

Bake in the preheated oven for about 11-12 minutes, or until the sides are firm but still soft in the center. See photo below.

Let cool for about 2 minutes (set the timer so you won't forget!). Thereafter, invert the cakes onto serving plates. They should release very quickly. Dust with the remaining powdered sugar. Serve with some fruits on the side, if desired.
Serve immediately! Enjoy all that gooey chocolate goodness! And, yes this is so perfect with vanilla ice cream, too or even plain whipped cream!

If you like what you see and would like to receive new recipe updates we'd love you to subscribe to our posts and join our site. Also do like us in Facebook so you can get the latest updates and so much more. Thanks for visiting and happy browsing!
This recipe is featured at Ladies' Night Linky Party.
Feb 5, 2013
4-Ingredient Nutella Cookies

I have been wanting to try making these Nutella cookies for the longest time but for some reason never got the chance to do so. But since today is World Nutella Day (who knew there is such a day?) I thought I ought to give it a try....after all I have some Nutella sitting on my counter top and waiting to be enjoyed.
The verdict - these Nutella Cookies are heavenly!!! Not only are they easy to make, they are so yummy too and amazingly not overpoweringly sweet! Moist, chewy and fudgy - pure chocolate deliciousness at it best! You really ought to try this!
I will give credit where credit is due....for this recipe I am totally indebted to Kirbie's Craving. I have adapted her Easiest Nutella Cookies for this recipe. And I would say --- it is a total winner!


Ingredients
1 cup Nutella
1 egg
1/2 cup + 2 Tablespoons flour
1/2 cup Semi-sweet Chocolate Chips

Procedure
Preheat the oven to 350F.
In a large mixing bowl, combine the nutella, flour and egg.

Using a wooden spoon, mix until the dough comes together and no flour lumps remain.

Stir in chocolate chips until they are all incorporated into the dough.

For the next step, I used a rounded tablespoon to help shape the cookies into dough balls. It's actually a rounded measuring tablespoon for a tea pot so it's slightly larger than your usual measuring spoon but the latter should work well too. I managed to make about 18 dough balls.
Place the cookie balls on a cookie sheet about 2 inches apart. I pressed the cookie balls slightly to flatten them a little bit. I think I will just leave them rounded next time. If you want perfectly rounded edges on your cookies, then smooth out the cracks on the cookies. I wasn't bothered so I just left it as is, cracks and all!

Bake for about 10 minutes. Cookies would still be slightly soft but that's fine. Leave in the cookie sheet for about 3-4 minutes or until it has hardened just a little bit to make it easier to transfer to a wire rack. Let the cookies cool on a wire rack until completely set.

Enjoy the cookies while still warm-ish and the choco chips are still soft and quite meltingly tender. Or serve it after it has totally cooled too - the cookies still retain their yummy chewiness! Chocolate perfection defined!
If you wish to print the recipe, there's a print icon below the post. Click on the "remove images" box for easy and convenient printing.

If you like what you see and would like to
receive new recipe updates we'd love you to subscribe to our posts and join our
site. Also do like us in Facebook so you can get the latest updates and so much
more. Thanks for visiting and happy browsing!

Dec 17, 2012
Ultimate Flourless Chocolate Cake (with Raspberry Coulis)

On a bi-monthly basis, we get a copy of the Urban St. Shore West magazine which features articles about local shops and happenings in West Michigan, particularly, our own city, Holland, MI. I always look forward to the magazine which can be found all over the shops in Holland. Every publication features a couple of really wonderful recipes from chefs, bakers or just wonderful cooks from the area. The magazine, thankfully, is also free and that's why I always get a copy! I also use it to keep track of the goings-on in our little town so that I am aware of any parades, shows, sales, announcements, etc. since I am always on the look-out for activities to bring my kids to.
For the Dec/Jan 2013 publication I chanced upon this lovely recipe for Flourless Cake from Chef Howard Norris. I have been on the look out for a good flourless recipes for awhile now since Mark began a gluten-free diet so that he can still enjoy some yummy treats without worrying if there's any gluten in it. So when I saw this and read that it was not difficult at all to do (and assumed that it must be good - it came from a local chef!) I thought, why not try it? I am so glad I did and there's no turning back from this recipe at all!

The first time I made it, I must admit I used baking chocolate albeit a very good quality one - Ghirardelli (60% cocoa). After I baked it and tasted it, I thought it just tasted like a very decadent and fudgy brownie (which is not at all an insult to the recipe for it tasted really good...just not what I expected) but when I left it overnight - something must have happened - the taste and texture improved dramatically and before I even got the chance to take some photos of the cake - it was gone - all gone! Can't really blame them or myself for eating it all too quick - it was so good!
So, I decided I need to do it again but this time with a proper chocolate bar - again using Ghirardelli (60 % cocoa) and oh I tell you - it was the probably the best flourless chocolate I ever had! This time I guarded the cake well and made sure I take some photos as proof of how yummylicious it looks - we eat with our eyes first, don't we? This time, I also made some Rasberry Coulis to go with it and of course to make the presentation complete - covered it with chocolate ganache and then placed a few raspberries on top! Wow, over the top delish! The cake is not very sweet - never really liked very sweet cakes anyway! - but it's pure chocolate goodness! Most of all, what a very easy recipe this truly is...anyone can do this, if I can, you sure can!
So here's the recipe - as is...the only adjustment I made is with regard to the Raspberry Coulis - I added a little more sugar since the cake wasn't very sweet. My only other contribution is the chocolate ganache - it's my own but feel free to make your own version. I only made it with two ingredients - chocolate and cream - didn't want to add any more flavoring and I think it really worked well with the cake - chocolate heaven, indeed!

Ingredients
4 oz fine quality bitter-sweet chocolate (not unsweetened)
1 stick (1/2 cup) unsalted butter
3/4 cup sugar (I used fine white baking sugar)
3 large eggs
1/2 cup unsweetened cocoa powder; plus additional for sprinkling (if not frosting)
Procedure
Preheat oven to 375F and spray an 8-inch round baking pan with Pam. Line bottom with a round of wax paper or parchment paper and coat with cooking spray. (I didn't do this but it probably helps in removing the cake, 'cause mine nearly broke but thankfully I frosted them so it didn't matter).
Chop chocolate into small pieces. In a double boiler or metal bowl set over a saucepan of barely simmering waterm melt chocolate with butter, stirring until smooth. Remove top of double boilers or bowl from the heat, and whisk sugar into chocolate mixture. Add eggs and whisk well. Sift 1/2 cocoa powder over chocolate mixture and whisk until combined.
Pour batter into the prepared pan and bake in the middle of the over for 25 minutes, or until top has formed a thin crust. Cool cake in a pan on a rack 5 minutes and invert onto a serving plate. Dust the cake with additional cocoa powder and serve or frost with ganache. (Cake keeps in an airtight container for one week - if you can manage to stay from it that long....I doubt it!) :-)
Chocolate Ganache
Ganache:
4 oz heavy whipping cream
4 oz bittersweet chocolate pieces (I used Ghirardelli again)
Place the heavy cream and chocolate in a small pan together. Melt the chocolate using low heat and by stirring until it becomes very smooth and shiny. Remove from the heat and spread it on the cake.
Begin by pouring the ganache onto the center
of the cake. Slowly, tip the cake from side to side to allow the ganache to flow off the sides. Stop when you have covered the entire cake. Do not touch the
ganache with any utensil or tool or even your finger, or it will not have a
smooth finish.
Allow the ganache to fully set before serving.
In the meantime you can make a Rasberry Coulis to go with it.
Raspberry Coulis
1 pint fresh raspberries
1/3 cup sugar
1 Tbsp arrowroot (dissolve with 1 Tbsp water)
Puree the raspberries with sugar. Strain juice (to ensure there are no seeds getting into the sauce) into a sauce pan and bring into simmer. Thicken with the dissolved arrowroot. Allow to cool before use. See photo on how you can use the coulis.

Dec 14, 2012
Chocolate Oatmeal with Cranberries and Granola

Of course, there are dried cranberries in store-bought granolas but that's cheating 'cause it's already made for you. The only effort you expend is opening the cereal box and pouring some milk on a bowl. I want to do something a bit more challenging than that. Make a breakfast that's easy to whip up for when I am in a hurry (especially with the holiday rush and all) and yet something that tastes great too (despite exerting less effort - though a little more than opening a cereal box!).
Then I remembered one of our friends from Facebook mentioning that she puts some cocoa powder on her oatmeal to give it that yummy choco taste. And of course, there's my chocolate rice porridge - if I can use cocoa powder to flavor my rice - why not oatmeal? After all, oatmeal soaks up flavor so well and definitely cooks faster than rice (especially the quick cooking variety). But, I didn't want a baked oatmeal this time though (I want something quicker and been there, done that) - so it has to be something that can be done on the stove top but will still achieve great flavor as if it was baked!
So using pretty much the same ingredients as my baked oatmeal (milk, vanilla extract, brown sugar, cinnamon and nutmeg except butter and eggs), plus some cocoa powder, I tried cooking the oatmeal with all the other ingredients on the stove top. It took literally just minutes and yet I came out with a beautiful chocolate flavored oatmeal which almost rival the champorado (chocolate rice porridge). I then added some dried cranberries to the cooked porridge (oh yum!) and it was heavenly already. To make it over the top delish - I included some granola to the mix (the store bought kind!) to add more texture and flavor. And voila! The result is a delicious, I'd dare say - even fancy - breakfast treat that looks like you fussed over it but actually did not! Try it and am pretty sure you'll love it. My hubby (the taster) love it even without the granola but as usual I like it with the granola so follow your instincts (and palate too)! Have a great breakfast!
Ingredients
3 1/2 cups milk
2 teaspoons, vanilla extract
2 Tablespoons, unsweetened Cocoa powder
1/2 teaspoon ground cinnamon
1/2 teaspon ground nutmeg
1/2 cup brown sugar, firmly packed
2 cups oats (quick cooking or old-fashioned)
1/2 cup dried cranberries or raisins
1/2 cup granola or muesli (homemade or store-bought - optional)
Procedure
In a saucepan (big enough to accomodate about 4 cups of liquid) over medium heat, combine milk, vanilla extract, cocoa, the spices and brown sugar. Blend the ingredients by using a whisk. Bring to a simmer. Add the oats and cook, stirring constantly until tender (slightly mushy). Quick cooking oats will probably just need about 2-3 minutes while the old-fashioned ones will take a few minutes longer. It all depends on the kind of consistestency you want the oats to have.
When the oatmeal is cooked, stir in the cranberries or raisins and the granola/muesli until well-mixed.
Pour in more milk as needed.
Serve immediately in individual bowls. Serves between 4-6 people.

Enjoy!
If you like what you see and would like to receive new recipe updates, we'd love you to subscribe to our posts or join our site. Needless to say, we'd love you to like us on Facebook too where you can get more recipes and updates. Thanks and happy browsing!
Dec 3, 2012
Almond, Coconut and Choco Chip Cookies (Gluten and Egg Free)

These gluten-free and grain-free cookies were inspired by the Indian ball-shaped sweet treats called Laddoo/Laddu. When I looked at the ingredients for this - Almond Chocolate Laddu - I was thrilled to discover that they were gluten-free. Perfect! My hubby is on a gluten-free diet and to ensure that he doesn't miss out on sweets (which are almost always a gluten-fest) I always try to experiment on new gluten-free desserts!
So I made the Almond Laddu based on the recipe and I actually fell in love with it! It was really yummy! Looking at these sweet balls they reminded me of cookie dough (although these ones you can eat right away) so, guess what? That gave me the idea of baking them and treat them like a true cookie dough and then see what happens.
I was not very optimistic at first. After all, there was no flour in it, not even eggs! How can this work? Yet, it was chewy and gooey enough and I thought it may be worth a try!
Boy, am I glad I tried it - it was even better cooked! Most of all - it's not only gluten-free, it's grain-free too! My hubby was very pleased and this has become one of his favorite treats - how can you not like it - almonds, coconuts and chocolate chips all rolled into one delicious treat! I can have this anytime!
By the way, the inspiration came from this lovely site - Simply Delicious - Almond Chocolate Laddu. I converted her measurements to American and used ingredients that I had available. I used almond meal and didn't make it from scratch. I can't remember exactly how many cookies I made 'cause half of them I made into Laddus while the other half I baked into cookies. I will note next time. I just know they are cute little nibbles that are oh so delicious! I will probably increase the measurement too so I can get more cookies out of it. In the meantime, here's the basic recipe which you can tweak to your heart's content! :-)
Ingredients
3/4 cup Almond flour/meal (like Trader Joe's)
1/4 cup chocolate chips (I like the dark chocolate variety)*
1 /4 cup sweetened condensed milk
1 Tbsp regular milk
1/2 cup grated coconut (I used the unsweetened variety)
*Use a gluten-free brand if you wish a completely gluten-free version otherwise, regular chips will do.
Procedure
Place the almond flour into a mixing bowl. Add the grated
coconut and mix well. Set aside.
In a small sauce pan combine the chocolate chips, condensed milk and regular milk. Melt the chocolate and mix well with the milk on low heat. Stir constantly until the chocolate melts.
Pour into the almond mixture and mix well with a wooden spoon.
Set aside to cool. When cool enough to handle, mix again by hand and shape into balls. While you are shaping the dough into cookie balls, preheat the oven to 350F.

Place the cookie balls (I did flatten them a little bit with a fork) in a cookie sheet (greased or lined with parchment paper). You may want to place a few chocolate chips on top for that extra chocolate flavor!

Bake for approximately 6-8 minutes.They're pretty small so they don't need a lot of time to cook, depends on how chewy you want them to be. Just do not overcook it unless you want a crunchier cookie. I think it's perfect at 8 minutes but since oven heating and temps vary, adjust the time accordingly.
In fact, if you want to stick with the original Laddu concept - you don't need to bake them at all - you can eat them as is and they're so yummy too!

Enjoy!
If you like what you see and would like to receive new recipe updates, we'd love you to join our site and/or like us on Facebook! Happy browsing!
Nov 24, 2012
Cranberry Chocolate Chip Cookies

It's beginning to look a lot like Christmas...so the song goes and that's why I was inspired to finally make some holiday cookies! Without much further ado - here's a cookie that's chewy, sweet with a hint of cinnamon and with the refreshing taste of fresh cranberries all rolled into one delicious Cranberry Choco Chip Cookies! Perfect for the holidays and as a lovely gift for family and friends!

If you're making this over the summer, you can replace the cranberries with fresh or dried cherries.

If you're making this over the summer, you can replace the cranberries with fresh or dried cherries.
Ingredients
1 1/2 cups flour
1 tsp baking soda
1 tsp cinnamon
1/4 tsp nutmeg (optional)
1 tsp salt
3 cups rolled oats (I used quick cooking oats)
3/4 cup unsalted butter, softened or room temp (1 1/2 sticks) - (if using salted butter lessen the salt to 1/2 tsp)
1 cup dark brown sugar, firmly packed
1/4 cup white sugar
2 eggs
1 tsp vanilla extract
1 cup fresh cranberries, coarsely chopped (Yes, the fresh ones are better.)
1 cup semi-sweet chocolate chips
Procedure
Preheat the oven to 350 F.
Prepare two cookie sheets. Grease or line them with parchment paper.
Sift into a big bowl or whisk together the flour, baking soda, cinnamon, nutmeg and salt. Add the oats to the flour mixture and mix well.

In a mixing bowl, beat together the butter, sugar, eggs and vanilla extract just until combined. My butter was already melted when I combined it with the other ingredients that's why it looks like this - more liquidy (I was in a hurry and had to melt them instead). However, if you have the luxury of time - room temp butter (softened) is so much better because the cookies would be more chewy and moist. If the butter is just softened it will only melt while at the oven hence the cookies retain more moisture. The taste will be the same either way though.

Add the egg mixture to the dry ingredients. Mix well until all the ingredients are moist.
Fold well into the batter the chopped cranberries and chocolate chips. Drop the mixture by rounded tablespoons onto the greased cookie sheets. An ice cream scooper is so helpful for this. I used a large one. Do not flatten the cookies. Bake for 10-12 minutes (depending on how big your cookies are, mine were big so I cooked for about 12 minutes but if you use a tablespoon as measurement then 10 minutes is perfect!) or until lightly browned. Do not overcook. 
Let stand for 5 minutes before you transfer to a wire rack to cool completely. They will be quite soft so you need to let them sit a bit. Makes between 50-55 cookies if you are using a rounded tablespoon. I used a large ice cream scoop the first time so I only managed to make about 2 dozen but the cookies were huge.

Perfect Christmas cookies in my opinion. Chewy, moist and delicious! If you wish to print the recipe, there is a print icon below the post. Click on "remove images" box for easy and convenient printing. Happy Baking!


If you like what you see and would like to receive new recipe updates, we'd love you to join our site or like us on Facebook. Happy Browsing!
Subscribe to:
Posts (Atom)
©
Manila Spoon | All rights reserved.