Top Recipes

Recent Creations

Aug 13, 2012

Sautéed Ground Pork with Asian Long Beans and Potatoes (Ginisang Sitaw at Patatas)


Sautéed Ground Pork with Asian Long Beans and Potatoes...quite a mouthful, isn't it? I wish the English name of the recipe is as short as the Tagalog (Filipino) one. Oh well, we don't want to be lost in translation, right? J
Of late, I feel like I have been baking a lot (some of the recipes are still on the testing stage but hopefully will get uploaded later). That explains the few pounds I have gained this summer! So, I thought I better go back to my Filipino diet, mostly gluten-free of course, but unfortunately, involving lots of carbs. We do eat rice at least three times a day in the Philippines! And I have not included the rice snacks we have and an additional meal (yes, meal not snack) between lunch and dinner which, guess what, involves "cold" left-over rice  (sorry, the Tagalog name escapes me at the moment) paired with some meat-and-vegetable dish. Today, I wanted to have rice with my dinner. But what shall I have with it?

The other day I found some Asian Long Beans (also called "Snake Beans" - how scary!) or Sitaw (known as Kibal in my province) in the Asian store and, of course, I bought it. I only usually see this during summer so I took a bunch home to cook later. Not only did I find long beans, I even found the lovely purple ones! (Unfortunately, they lose their lovely color once cooked but the crunchy texture and delicious flavor are retained thankfully!)


Usually, I would pair this with my favorite veggie - the Squash! - but I didn't have any. The only vegetable left on my kitchen were a few pieces of red potatoes which really needed to be used right away. I thought it might be a weird combination for while we love potatoes and use them a lot in the Philippines, in my house we have never tried to combine it with Sitaw. Oh well, there's always a first time. And at least I'll finally know if they can go together. And they married perfectly in this dish! The starchy potatoes worked really well with the crunchy Sitaw. I loved the flavor combo and the texture which both veggies have imparted to the dish.

Of course, it won't be complete without the sautéed ground pork (Ginisang Giniling). The sautéed ground pork is always the base for many of our dishes especially in our household. I always combine it with veggies like squash, beans, cabbage, potatoes, etc. Here is a link for the Giniling recipe


Usually, I use about half of the Giniling recipe but feel free to use the entire one if you like. Just add more veggies!

Ingredients


Half the Giniling Recipe
1/2 to 1 whole bunch of Asian Long Beans (some bunches are bigger than others)
3-4 medium red potatoes
Extra soy sauce, salt or fish sauce to season the dish. Choose your fave seasoning!
Ground Pepper (may be added too)


Procedure

Rinse the beans and potatoes before using.

Snap the beans in 2-inch pieces by using your bare hands. They will naturally snap when you try to bend them. Easy! I also snap-off one of the ends of the beans (the rounded end not the tail).

Peel the potatoes and cut them into cubes.


If you have just cooked the Giniling (meat is already tender and flavorful), you can immediately add these veggies to the mix and then cover and cook until tender roughly 10-15 minutes.

If not, warm up the giniling recipe first (if it's been cooked beforehand).
Once it begins to simmer or is about to reach boiling point, add in the vegetables. Spread them in the pan to get an even cooking. Cover and simmer as above for about 10-15 minutes or until the potatoes are tender and the beans fully cooked yet still retain some crunch.


If it dries up, add some water and adjust the seasoning with either salt, soy sauce or to impart more flavor - fish sauce (But it is rather smelly so don't cover the pan until the lovely aroma of the fish sauce has disappeared, just a few minutes. Trust me, it's worth it!). I add ground peppers too for more flavor!

Needless to say, it's perfect with rice! Enjoy!


Share:

Aug 9, 2012

Blueberry Sour Cream Cake


My favorite summer/American fruit has got to be blueberries. Not only is it delicious, it is also very nutritious! Full-packed with anti-oxidants and considered a super-food, it's got to be on the top of any must-eat-this list.

I love the fact that it is so easy to pick and eat as well. While other fruits can be cumbersome to peel and cut up, not with my fave berry - just wash them and they're good to go! I know it sounds lazy, but isn't that a good motivation to get some of your required daily 5 servings of fruits?

I may be biased but I think Michigan Blueberries are simply the best. I have tasted some blueberries from other state, especially during the off-season, and they're not as juicy and sweet as the Michigan ones. I don't know, I could be wrong but this is what my taste buds tell me. Blueberries from Michigan are reason enough for me to spend the summer in this lovely state. That's why when we get the chance and the tots are up to it, we go blueberry picking.


Blueberry Sour Cream Cake baked in a Demarle Sunflower Mold. 
While my first option when blueberries abound is to just eat them on their own - oftentimes, I  like to use them for baking (if we have left-overs, that is!). This blueberry sour cream cake is now one of our summer favorites. I made it for the first time this summer and, though it was a first attempt, I thought it was pretty good. It was moist and yet light. And when you bite into those berries, the experience is complete. Besides, any cake with sour cream in it has got to be good, right? 

Try this light but tasty blueberry cake this summer. Have it for dessert or with your coffee and if you're Brit, like my hubby, have it with cream too. For him, everything tastes even better with cream! I must agree!

Ingredients

2 cups flour plus 2 Tbsp extra (separated)
1 1/2 cups sugar*
2 tsp baking powder
1/2 tsp salt
1 cup / 8 oz sour cream (you may sub plain or Greek (plain) yogurt)
2 large eggs
1/2 cup olive oil (light or the fruity version)*
1 tsp vanilla
1 1/3 cups fresh blueberries (rolled into the 2 tbsp flour)

*You can lessen the sugar and make it to 1/4 cup less especially if you are adding a Lemon glaze otherwise the regular measurement is fine.

*You can sub with regular vegetable oil if you don't have Olive Oil.

Procedure

Preheat oven to 350F/180C. Lightly grease a bundt pan.

In a large mixing bowl,combine all the dry ingredients. Set aside.


Roll the blueberries in the 2 tbsp flour until coated.

In another bowl, beat the eggs with the sour cream just until combined. Pour in the oil and the vanilla and mix.

Mix the wet ingredients with the dry. It will be a thick batter.


Fold in the berries.


Transfer the batter to the prepared pan. Bake for about 40-45 minutes or until a tester inserted in the middle comes out clean or with only a few crumbs clinging to it.


Let it cool in the pan for at least half an hour before transferring it to a wire rack to cool completely.


Sprinkle with confectioner's sugar if you like. Enjoy your delicious blueberry cake! If you fancy doing a bit more to it - why not drizzle some Lemon-Glaze on top to provide extra tang and yumminess! Just lessen the sugar in the batter by 1/4 cup if you decide to add the glaze and it's the perfect combination of sweet and tang or if you prefer just make it as usual. Either way it's fantastic! 


For the Lemon-Glaze

1 cup, confectioner's sugar (powdered sugar)
2-3 Tablespoons Lemon juice (depending on the tartness and thickness of the glaze that
 you prefer so feel free to adjust).

Place the powdered sugar and lemon juice in a mixing bowl. Beat until it reaches a smooth and pourable consistency. Easy! Let the cake cool completely before you add the glaze. 


If you wish to print the recipe, there's a print-friendly icon at the end of the post. Click on the "remove images box" for easy and convenient printing.


If you like what you see and would like to receive new recipe updates we'd love you to subscribe to our posts and join our site. Also do like us in Facebook so you can get the latest updates and so much more. Thanks for visiting and happy browsing! 

"Be merciful to me, O God, be merciful to me, for in you my soul takes refuge; in the shadow of your wings I will take refuge, till the storms of destruction pass by." Psalm 57:1
Share:

Aug 6, 2012

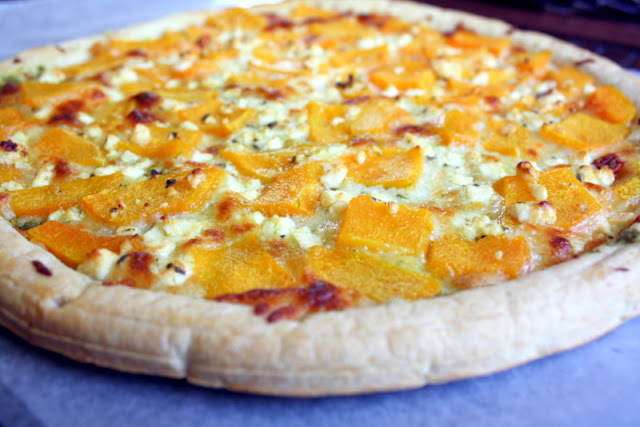
Pizza Calabaza (Roasted Butternut Squash Pizza)


If you ask me what my favorite vegetable is ---- squash is my one and only answer! Much like in Africa, where squash reign supreme, in the Philippines you'll often find cooked kalabasa/calabaza on any given day at any family's table. Sauteed pork with squash would be a cafeteria favorite and, in our house, we have this at least once a week. Sometimes, when we feel like it, we add some coconut milk and some chili peppers to the mix and you have the best viand that's perfect for a hot bowl of rice.

But in this post, I give a different treatment to the humble squash. Instead of cooking it with meat and other veggies, I thought why not try it as a pizza topping? I love vegetarian pizzas so I thought I'd give it a try. I had to think of what would possibly complement the sweet butternut squash and the first thing that came into my mind was pesto. For the cheese, I used some mozarella and then added a few tablespoons of feta cheese since I had them on hand. If you don't have feta cheese don't despair, it's fine without it and since mozarella is quite expensive in the Philippines, am sure you can do a Greenwich style pizza and use cheddar cheese instead. Experiment and see what you can come up with!

My first attempt though wasn't a resounding success BUT only because I used the wrong pizza dough. I used a flavored (Italian) one and that made the dish a little too salty and spicy for our liking.

However,  I wasn't about to give up on this idea so I tried again with plain white pizza dough, and it was so much better. Really good! You taste the sweetness of the roasted butternut and then the saltiness of the pesto. Just a wonderful sweet-salty combo which my family enjoyed!

So, I do suggest just using plain pizza dough for this and yes, I used a store-bought one.    I don't have the energy nor the inclination to make my own. :-( Perhaps in the near future I will attempt but until then, am happy with what I have!


Ingredients
  • 1 Pizza dough (homemade or store-bought, pref. plain/unflavored)
  • 2 cups  butternut squash, peeled and cut into thin slices about 1 inch in length
  • 1 Tbsp pesto
  • 1 1/2 - 2 cups shredded mozarella cheese
  • 1/4  cup crumbled Feta cheese (optional)
  • Olive oil (1-2 Tbsp)

Procedure
Preheat oven to 350F. Place the butternut squash slices in a  baking tray. Toss with a little olive oil until coated. You may lightly season it with salt and pepper but that's entirely up to you. Roast the squash for about 12-15 minutes or until it is tender. Remove from oven and set aside.


Adjust the oven temperature as stated on the pizza manufacturer's instruction (usually between 400F-450F).

In the meantime, prepare the pizza dough by spreading the pesto all over it. 


Sprinkle the cheese/s on top leaving about a 1 inch border.


Top with the roasted butternut squash.


Cook according to the pizza manufacturer's instruction.


Enjoy with some salad on the side. Perfect for lunch or a light dinner.


This recipe is featured on Walking On Sunshine and Foodie Friends Friday Linky Party.

If you like what you see and wish to receive updates on new recipes, feel free to join our site or like us on Facebook. Thanks for dropping by!

Share:

Aug 4, 2012

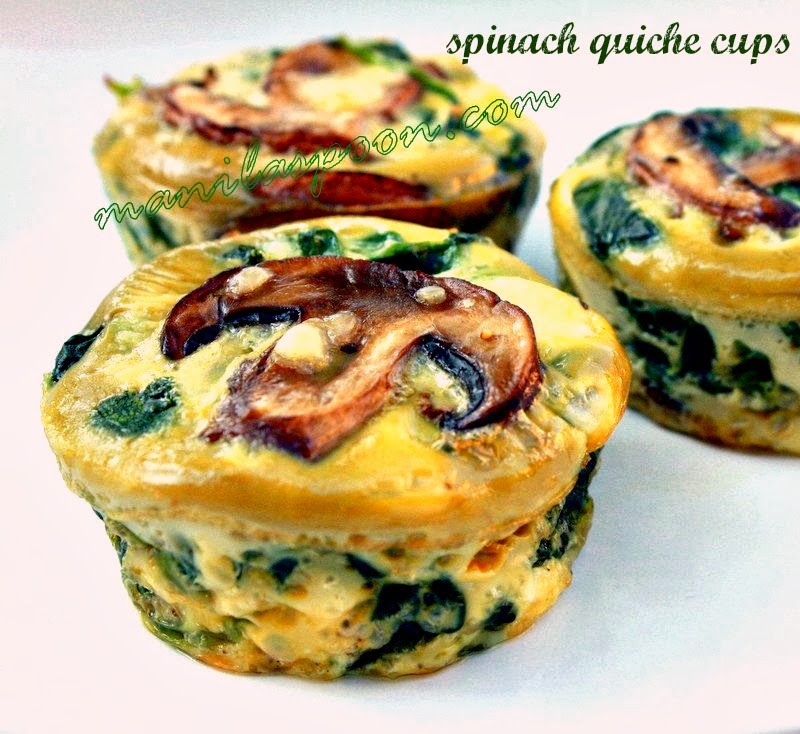
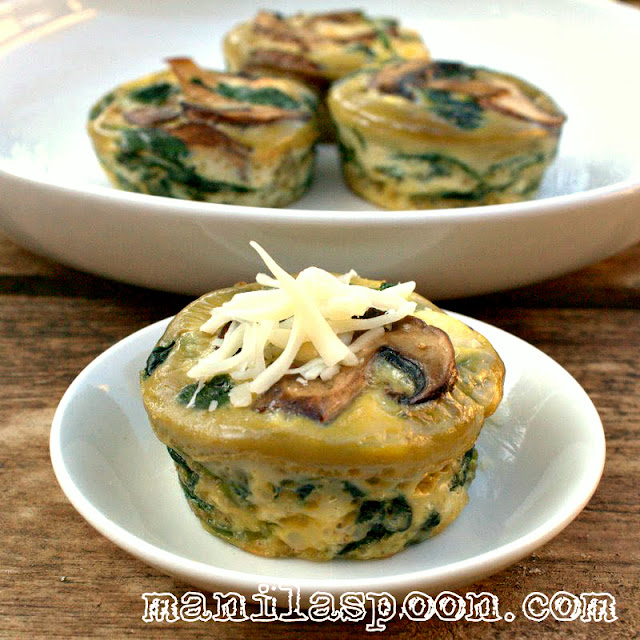
Spinach Quiche Cups

Completely gluten-free and low-carb is this healthy and delicious SPINACH QUICHE CUPS that everyone will enjoy. You can tweak the recipe to add your favorite vegetables! 


A friend of mine is a distributor of Demarle products (Silpat, Flexipan and Silform non-stick bakeware made of fiberglass and food grade silicone from France). This week she kindly lent me some of her wares so I could try them at home and learn how to use them, or sort of put them to the test.


One of the products I borrowed was her flexi-muffin tray. Since it is supposed to be non-stick, I thought the perfect dish to try would be my crustless spinach quiche cups (inspired by South Beach Diet's Vegetable Quiche Cups), my favorite breakfast treat when I am in the mood for a low-carb and gluten-free diet. I love these mini-quiches but when I bake them without using liners, it can be painful to clean up the pan afterwards. That's despite the claim that they are non-stick and that I even used some oil spray on them. So, I am really looking for a product that I can use for this recipe - one that will truly work and would also provide hassle-free cleaning. 


Wow, I am amazed at the result! One look at the photo above and you can already see that it was an astounding success. Look at these beautiful quiches, how they stand up so well, perfectly shaped, didn't look like half of them were left in the muffin pan (that usually happens before I used this wonderful product). I also tried baking raspberry muffins in the flexi-tray and they came out beautiful as well.

And, because it's truly non-stick I did not use any muffin liners nor did I ever need to grease the pan. How's that for convenience? However, if you don't have this pan, don't fret, either just use muffin liners or grease your muffin pan.

Here's the recipe for the spinach quiche which is truly a healthy low-carb and gluten-free breakfast. Try it!


Print Friendly and PDF 

 Ingredients

A little olive oil (for cooking the mushrooms)

1 (10 oz) package fresh spinach (I used the baby ones) --- about 284 grams
4 eggs (if the yolks are quite small I use 5 eggs)
1 cup shredded cheese of your choice (I use mozzarella or the Italian Blend)
1 (8 oz package) mini-bella mushrooms, chopped
1-2 Tbsp, heavy cream or half-and-half (optional)
Salt and Pepper, to taste

*Variation - If you don't fancy mushrooms, try asparagus or bell peppers with the spinach. Also, add some onions to the mix. I add some when I do not use mushrooms.

Procedure

Preheat the oven to 375F or 190C.

Heat a little oil in a large skillet. Saute the mushrooms until they are soft, about 5-6 minutes. Set Aside.


Place the spinach in a deep pan or in the skillet that you used for the mushrooms. Add a little water, 1/4 cup should do it. Using medium heat, cook the spinach just until wilted, about 3-4 mins. Use either your hand or a spatula to pack in the spinach. Drain the excess water really well (especially if you decide to use frozen spinach instead).


In a large mixing bowl, whisk the eggs until combined. Add the cooked mushrooms, spinach, cheeses and cream (if using) to the eggs. Mix well. Season to taste. 


Divide evenly among the 12 muffin cups. The muffin tray was slightly bigger than usual so I only filled about 10 cups.


Bake for about 20-23 minutes, or until it's well set and a tester/toothpick inserted in the center comes out clean.


Leave in the pan for a few minutes or just until it's cool enough to handle. It was so easy to remove them from the pan! They practically pop-out!

Sprinkle with a little more cheese on top, if desired. Mark enjoys them with rice on the side!

If you like what you see and wish to receive updates on new recipes, feel free to subscribe to our feed, like us on Facebook  or follow us on Pinterest. Thank you so much for dropping by! Happy eating!


Share:

Aug 1, 2012

Stuffed Bell Peppers (Pinoy Style)


I love bell peppers! When they abound in summer time, I think of all the recipes that I can use them for. You see, red and other colored (except for the green) bell peppers are quite expensive so I take advantage of buying them during summer when they are in season. I love getting the freshest most beautiful peppers in the Farmers' market.

One of the recipes I have been wanting to do for the longest time is stuffed bell peppers. The question is, what kind of stuffing should I make? I didn't want to use just the usual browned ground beef. I thought why not try to use my recipe for arroz a la cubana and do a Pinoy version of stuffed bell peppers? After all it's a recipe that calls for ground meat but with the addition of carrots, raisins and peppers/potatoes, hmmm....why not?

So I tried it and it worked! From now on, this will be my stuffing for bell peppers.

Most stuffed bell pepper recipes would call for the use of the oven to cook this dish. But it's summer time and I don't want to turn the house into a furnace in the middle of an already hot summer so I decided to experiment and use my cast iron instead. Instead of using the oven, I cooked it on the stove top. It worked too! Not only is it possible to cook stuffed bell peppers outside the oven, I also managed to cut the cooking time in half the time. Most of all, the peppers retained their lovely shape. Easy, quick and delicious cooking! Enjoy this recipe while the peppers abound!

For this dish, the arroz a la cubana recipe is indispensable. Click here to get the recipe. When using the recipe as a stuffing, I replace the peppers with red potatoes since we are already using them as the receptacle for the dish.


If you wish to print the recipe, there's a print icon below the post. Don't forget to click on the "remove images" box for easy and convenient printing. Thanks.

Ingredients

Ground meat cooked based on arroz a la cubana recipe (click here).
6 large bell peppers of various colors (if using the entire arroz recipe)
1 (14 oz) can tomato sauce plus half a can of water 
1 teaspoon gluten-free Soy sauce, or to taste
1 teaspoon gluten-free Oyster sauce, or to taste 
1 Tablespoon brown Sugar, or to taste 
Salt and pepper, to taste

Procedure

In a cast iron or any deep and large cooking pan, heat the tomato sauce and the water. Season with soy and oyster sauce, sugar and a little salt and pepper. Adjust the seasoning to your taste. Try to achieve a balance between sweetness, saltiness and tartness. Simmer the sauce while you prepare the bell peppers.


Rinse and dry the bell peppers. Cut the tops off and remove the seeds. You may need to taper the bottom of the peppers to ensure that they stand.


Fill the bell peppers with the ground meat mixture up to the top and more if you wish.

Place the peppers inside the cast iron casserole and cook on gentle simmer for about 30 minutes or until the peppers are fully cooked through and tender.


Spoon the sauce on the peppers and serve them with steamed rice on the side. Yum! Truly Pinoy!

If you wish to print the recipe, there's a print-friendly icon below the post. Click on the "remove images" box for easy and convenient printing.

If you like what you see and wish to receive updates on new recipes, feel free to join our site or like us on Facebook. Thank you so much for dropping by!


Hatred stirs up strife, but love covers all offenses. Proverbs 10:12


Share:
© Manila Spoon | All rights reserved.
Blogger Template created by pipdig